AI Agents Actions
AI Agents in Syskit Point is currently in Early Access and free to use while the feature is in active development. Feature behavior and scope may change as new capabilities are released.
Through Syskit Point, you can get a unified inventory of the Microsoft agents and Entra apps that can access your Microsoft 365 data.
To help you manage them, the following actions are available in Syskit Point:
- Agent actions
- App actions
These actions help you stop users from using agents, stop apps from signing in to your tenant, resolve orphaned agents by assigning a new owner, and remove agents and apps that are no longer needed.
- Take a look at the Agents Inventory Report article for more details on the agents report.
- Take a look at the Apps Inventory Report article for more details on the apps report.
Agent Actions
Agent actions can be completed on the Agents Inventory report and on the agent details screen.
To complete agent actions, you need permission to manage the agent in Microsoft 365.
You can access the Agents Inventory report by:
- Clicking View all agents on the AI Agents Dashboard tile
- Clicking the Reports button located on the left side of the screen, selecting the AI Agents category in the filter in the upper left corner, and clicking the Agents Inventory report tile to generate the report
To open the agent details screen, click the agent name on the Agents Inventory report.
Block and Unblock
The Block and Unblock actions can be completed for Copilot Studio and Agent Builder agents.
- Block an agent to stop people from using it.
- Unblock an agent to make it available again.
Once you generate the Agents Inventory report:
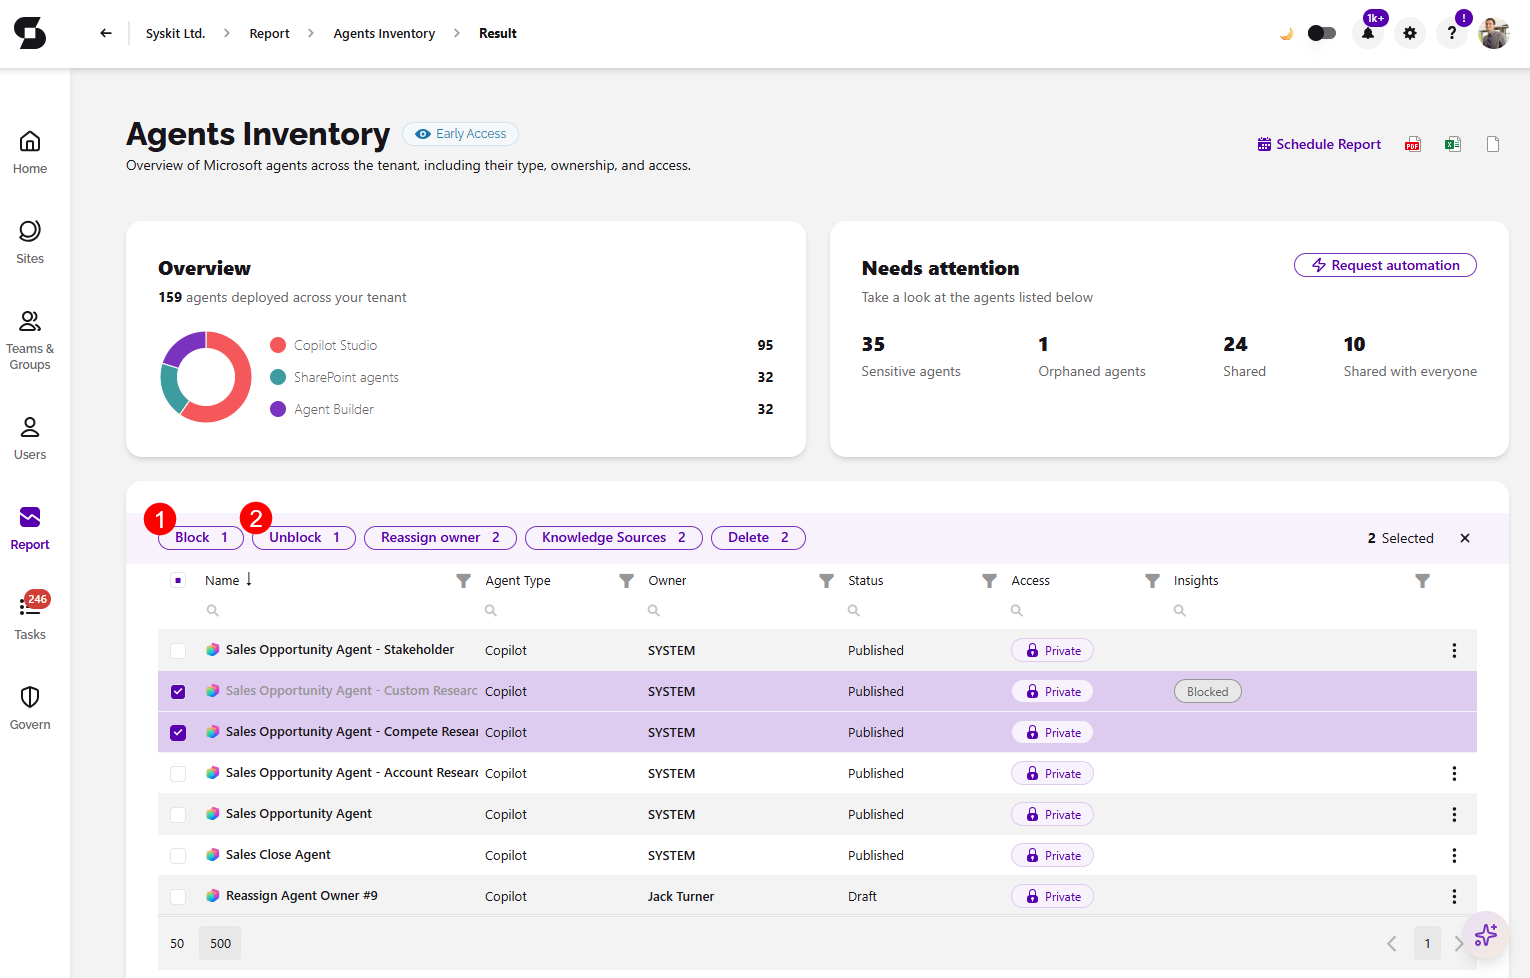
- Selecting one or more agents lets you complete the Block or Unblock action
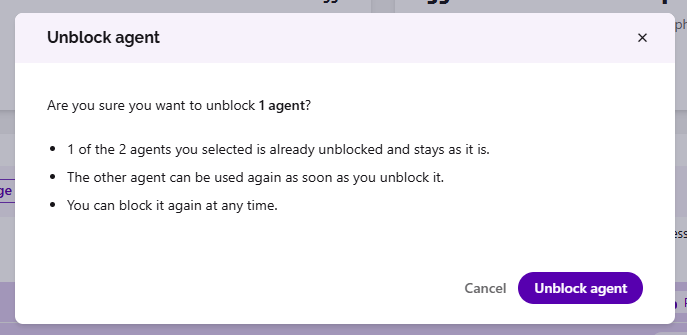
- The Block action (1) is available for agents that are not blocked
- The Unblock action (2) is available for agents that are already blocked
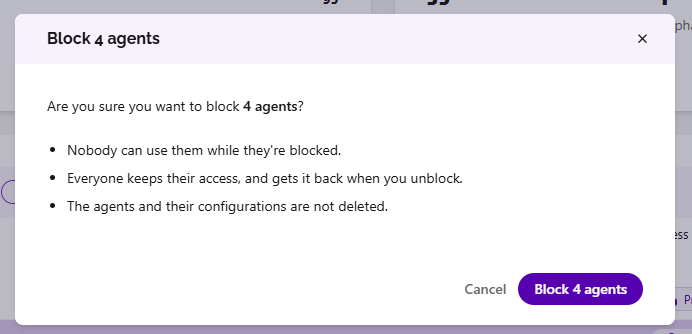
- Clicking the Block or Unblock action opens the confirmation dialog
- When you select multiple agents, the dialog title and the confirmation button show the number of agents the action applies to
- Confirm the action to block or unblock the selected agents
On the agent details screen, the Block or Unblock action is available depending on whether the agent is already blocked.
Reassign
The Reassign owner action can be completed for Copilot Studio and Agent Builder agents. It lets you assign a new owner to an agent, which can come in handy for orphaned agents.
Once you generate the Agents Inventory report:
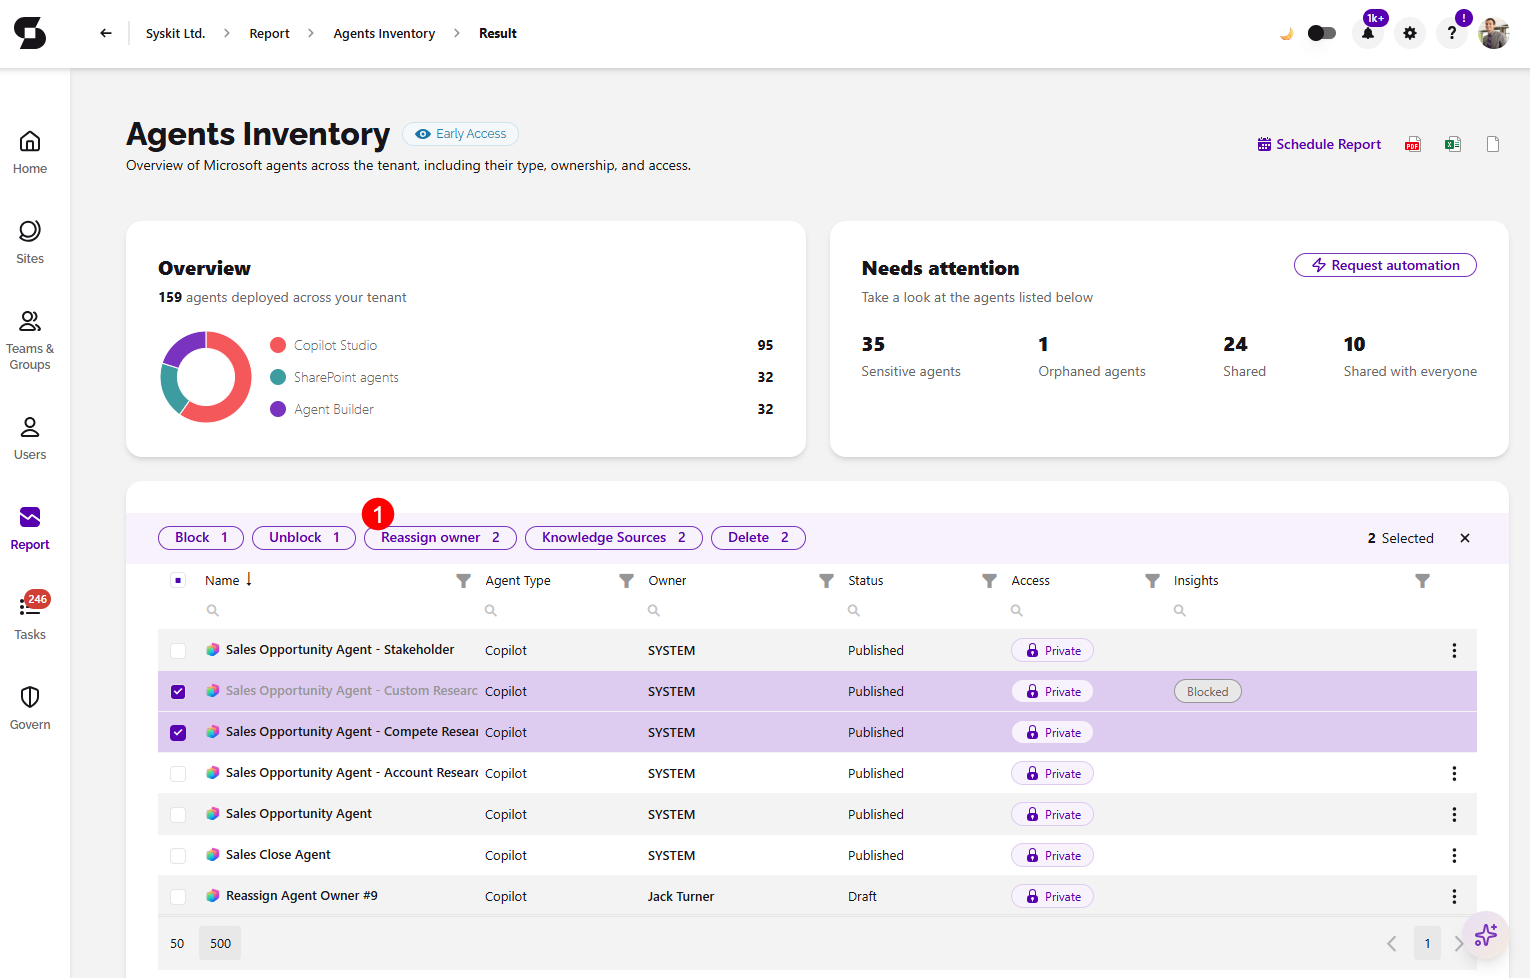
- Selecting one agent lets you complete the Reassign owner action (1)
- You can also select multiple agents to reassign them at once
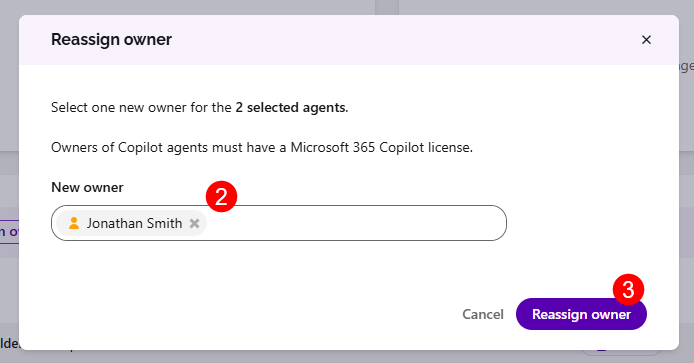
- Clicking the Reassign owner action opens the confirmation dialog where you can select the new owner(s) (2)
- Click the Reassign owner button (3) to set the new owner(s) of the agent once you've made your choice
Note that the new owner must have access to the Power Platform environment where the agent is located.
Delete Agent
The Delete action helps you remove agents that are no longer needed. It can be completed for Copilot Studio, Agent Builder, and SharePoint agents.
- For SharePoint agents, the agent file is deleted from the site where it is stored.
Once you generate the Agents Inventory report:
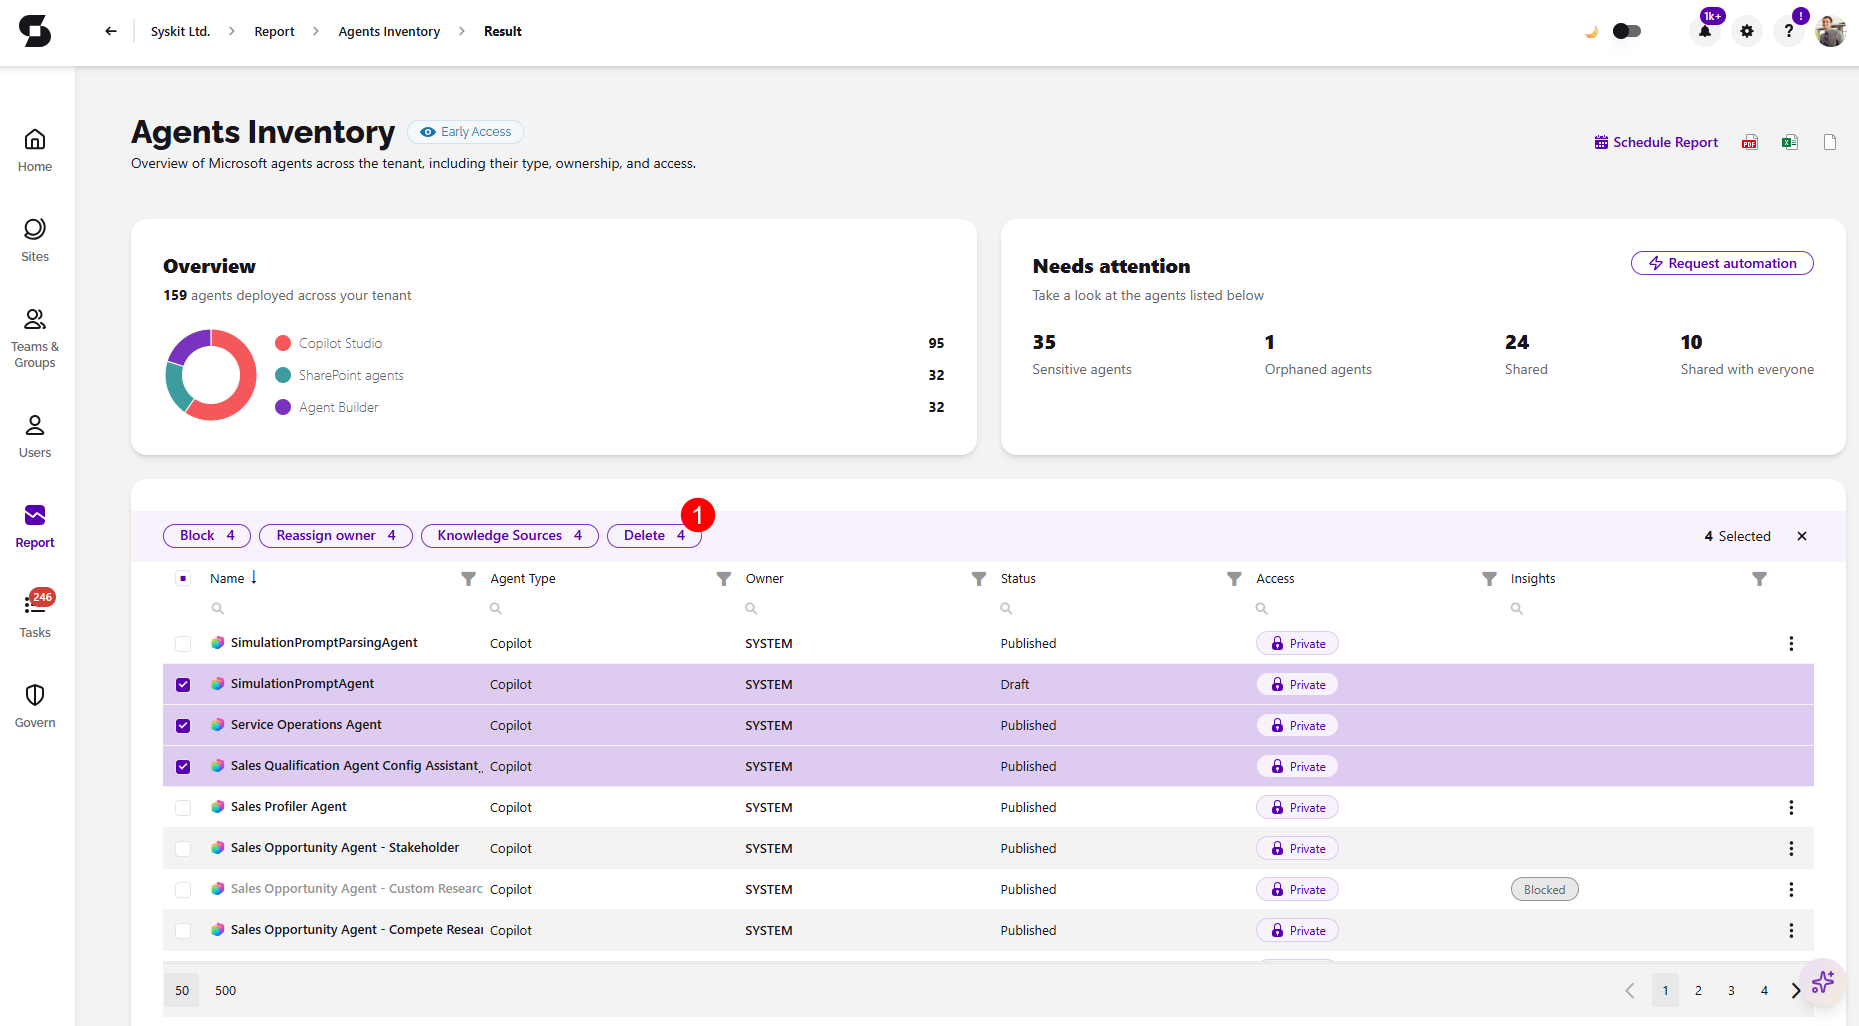
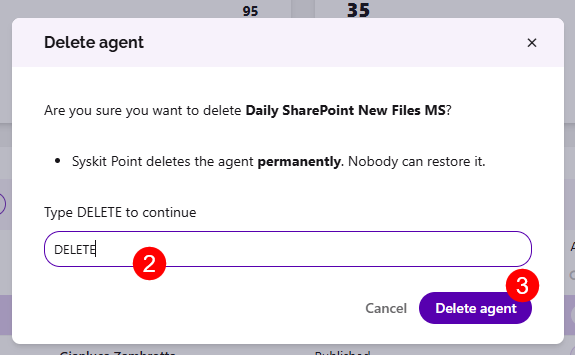
- Selecting an agent lets you complete the Delete action (1)
- Clicking the Delete action opens the confirmation dialog
- Type Delete (2) in the designated area to confirm your choice
- Click the Delete agent (3) button to delete the agent
Knowledge Sources
The Knowledge Sources action opens a list of all the knowledge sources the selected agent uses. For each source, you can see its:
- Name
- Type
- Location
- Sensitivity Label
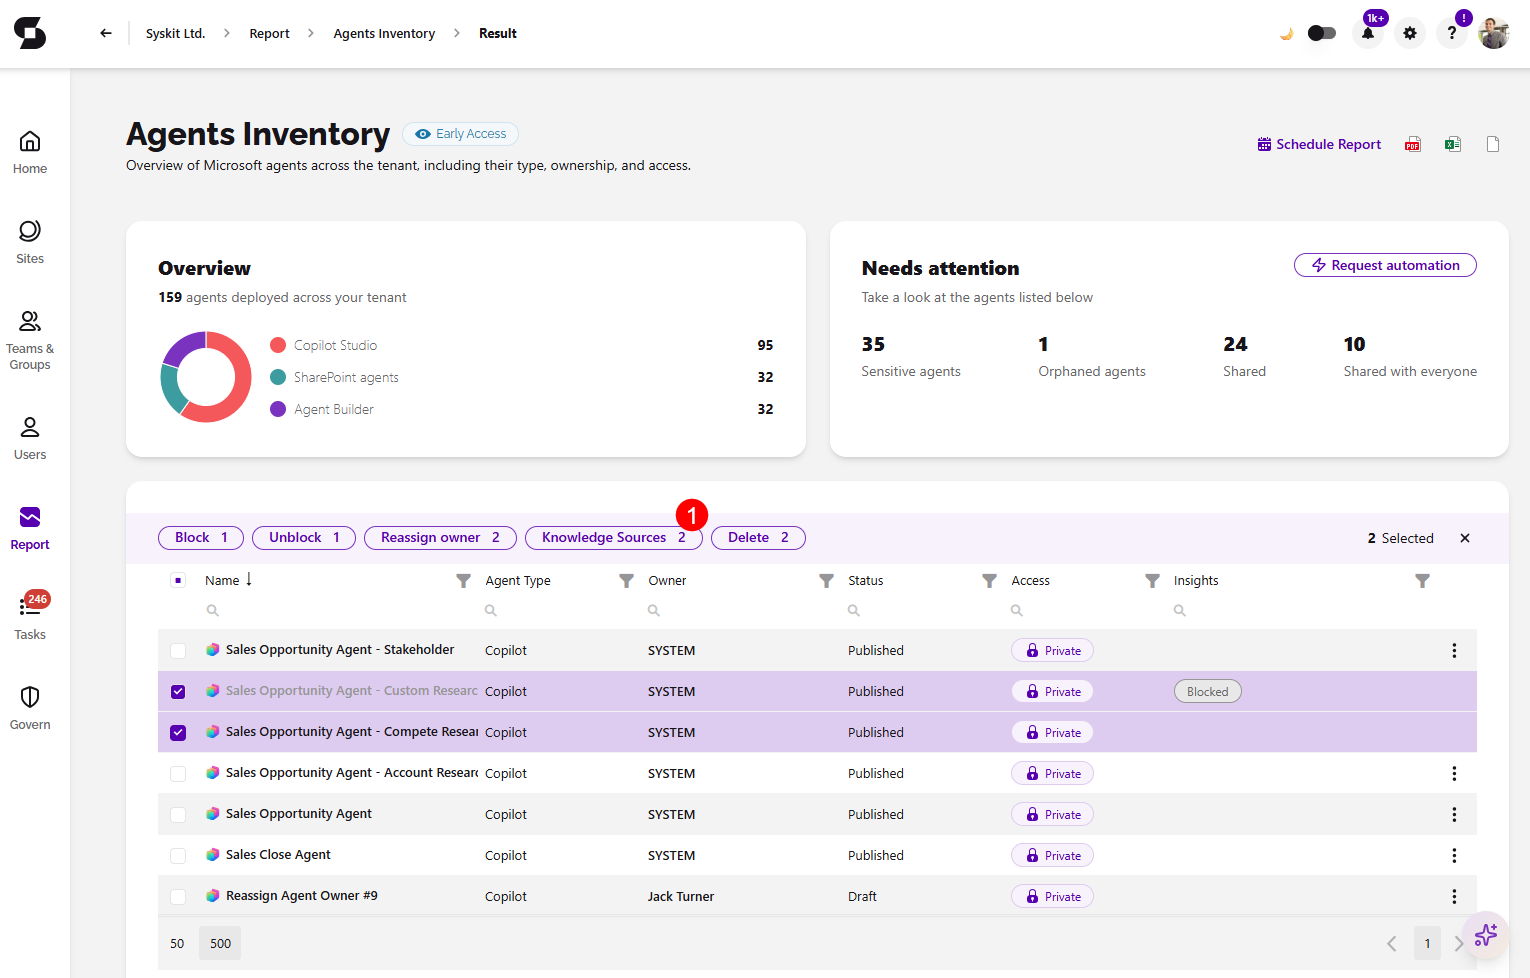
Once you generate the Agents Inventory report, select an agent and click the Knowledge Sources action (1) to open the list.
Entra App Actions
Entra App actions can be completed on the Apps Inventory report and on the app details screen.
You can access the Apps Inventory report by:
- Clicking View all apps in the Entra Apps section of the AI Agents Dashboard tile
- Clicking the Reports button located on the left side of the screen, selecting the AI Agents category in the filter in the upper left corner, and clicking the Apps Inventory report tile to generate the report
To open the app details screen, click the app name on the Apps Inventory report.
On the app details screen, any app actions taken apply only to that app.
Block sign-in and Allow sign-in
- Block sign-in stops the app from signing in to your tenant.
- Allow sign-in lets the app sign in to your tenant again.
Which of the two actions is available depends on the app's current sign-in state:
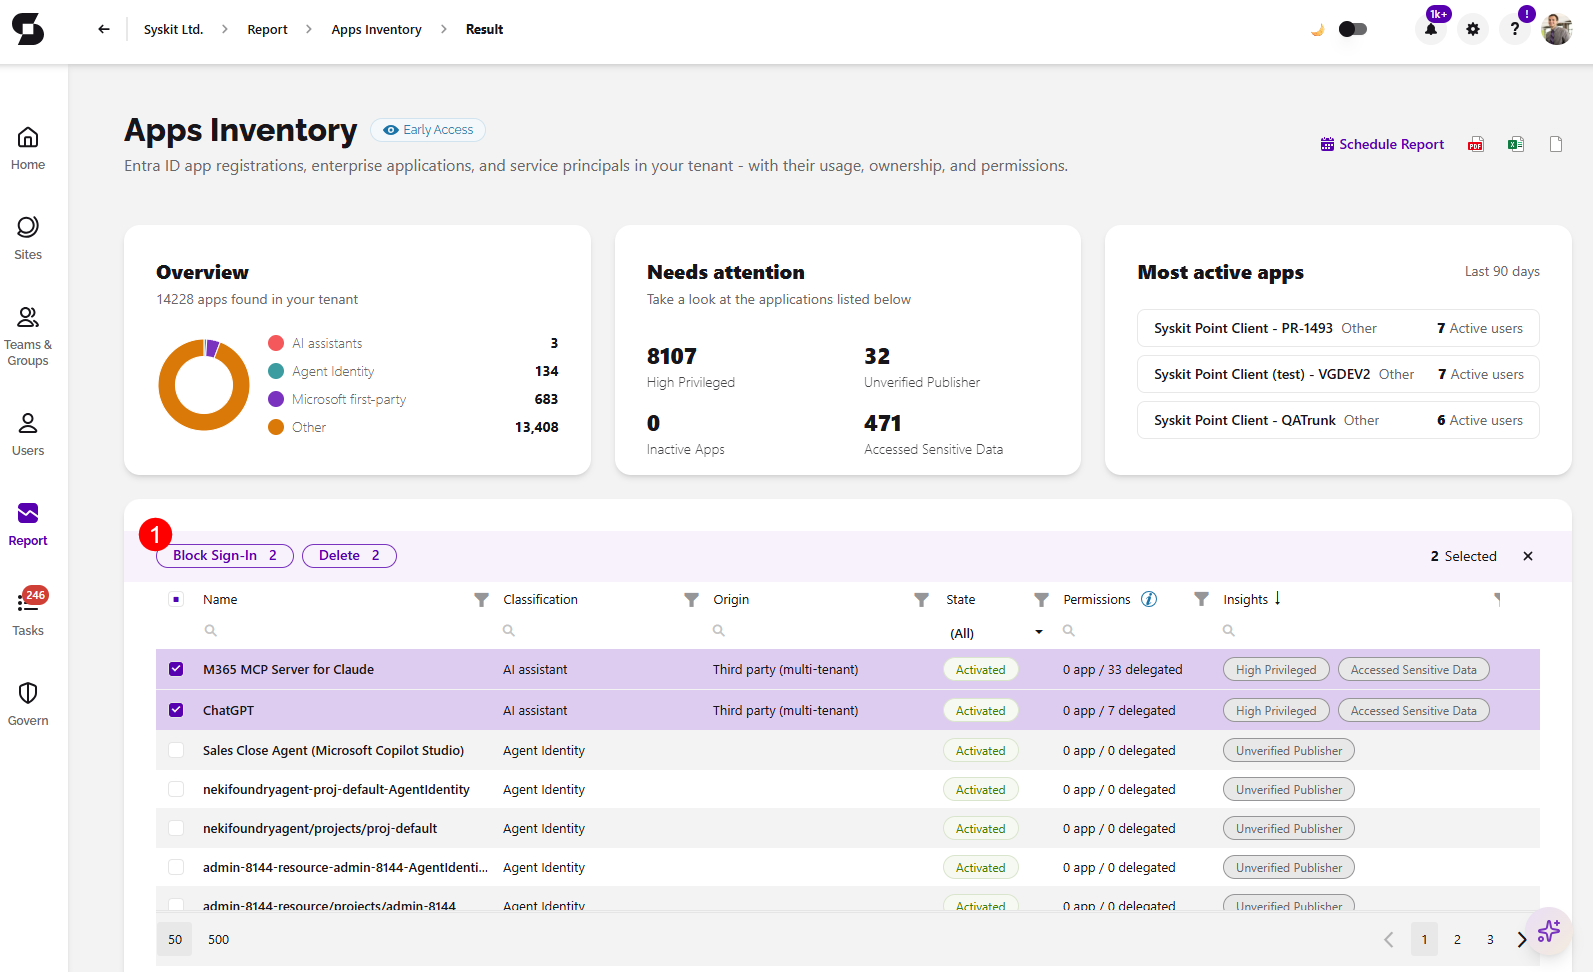
- The Block sign-in action (1) is available for apps that can currently sign in.
- The Allow sign-in action is available for apps whose sign-in is blocked.
Once you generate the Apps Inventory report:
- Selecting one or more apps lets you complete the Block sign-in or Allow sign-in action.
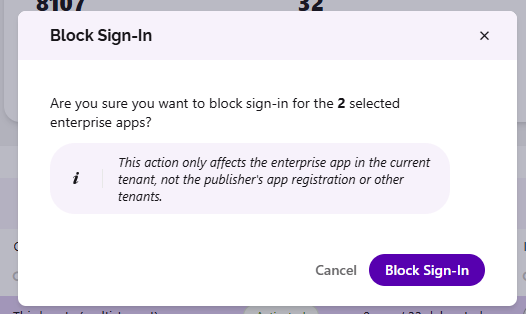
- Clicking the Block sign-in or Allow sign-in action opens the confirmation dialog that lists the selected apps and the sign-in state that will be applied.
- For multi-tenant apps, the dialog explains that the action affects only the enterprise application in your tenant, not the publisher's app registration or other tenants.
- Confirm the action to apply the new sign-in state.
Delete App
The Delete action helps you remove apps that are no longer needed.
- For apps registered in your tenant, both the app registration and its enterprise application are deleted.
- For multi-tenant apps, only the enterprise application in your tenant is deleted, as the publisher's app registration is located outside your tenant.
Once you generate the Apps Inventory report:
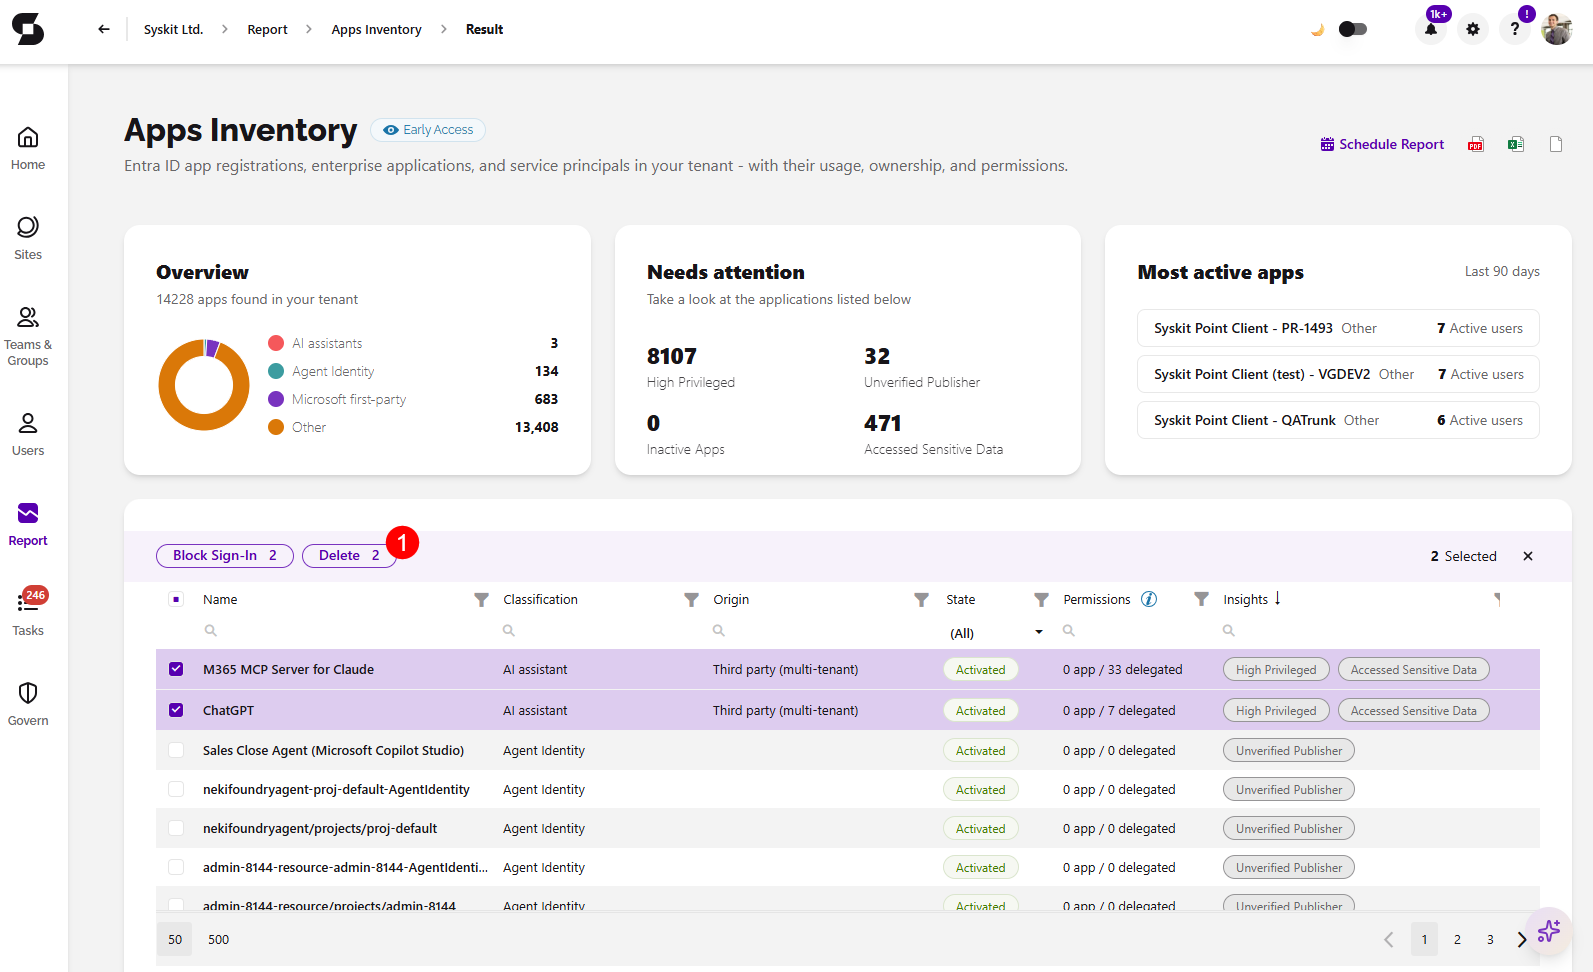
- Selecting one or more apps lets you complete the Delete action (1).
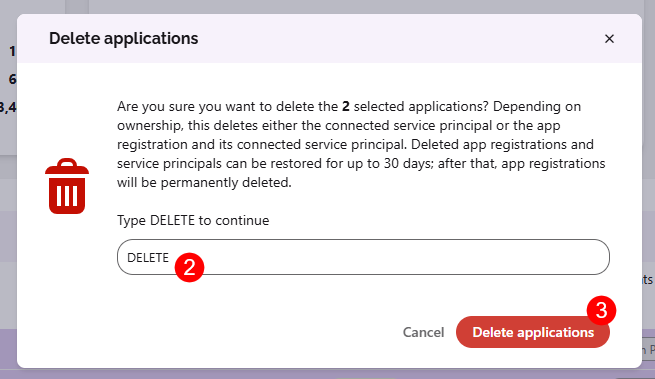
- Clicking the Delete action opens the confirmation dialog that describes what will be deleted for the selected apps.
- Type Delete (2) to confirm you want to delete the apps.
- Click the Delete applications (3) button to finalize your decision.
When you delete an app from the app details screen, you are returned to the Apps Inventory report once the action is completed.