Deploy Syskit Point
Please note!
Before you continue, make sure to read the resource requirements article.
Prepare the following for Syskit Point deployment:
- pre-created Azure resource group and user credentials of a resource group owner, or
- user credentials of a user able to create a new Azure resource group
Please note!
To successfully deploy Syskit Point, you need:
- A user that is an owner of the resource group you'll be using for Syskit Point
- Or a user who can create a new Azure resource group
- A user with Global Admin access
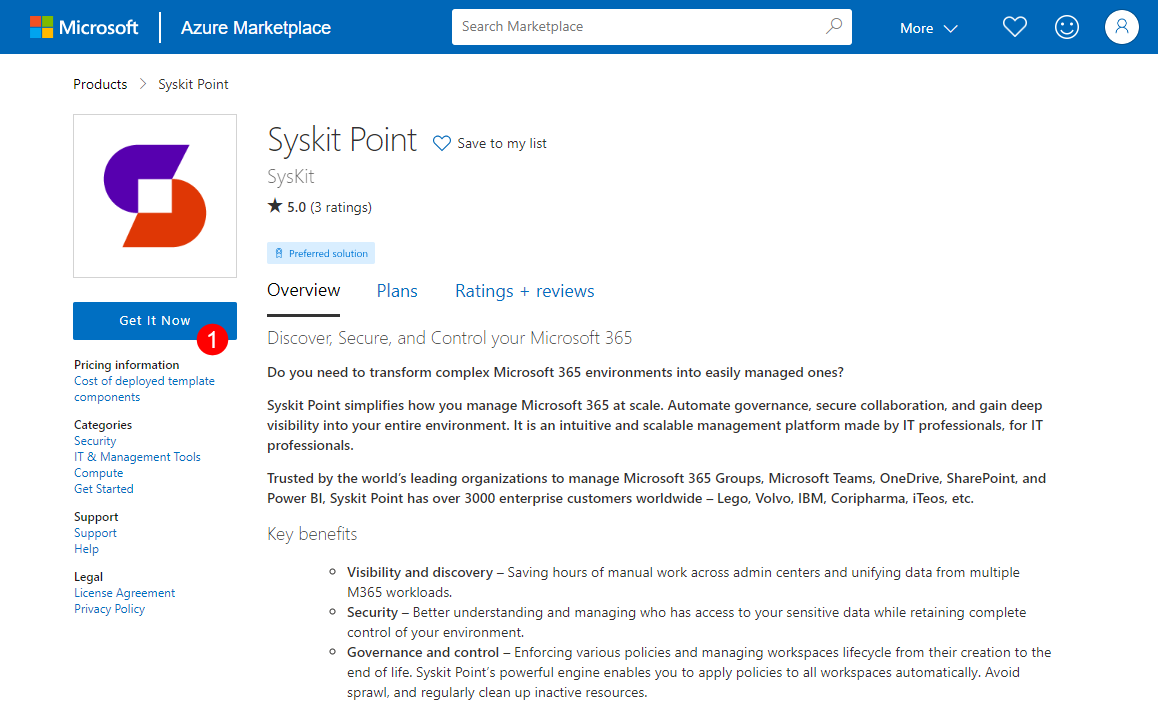
Azure Marketplace
- start by opening the Syskit Point product page on Azure Marketplace
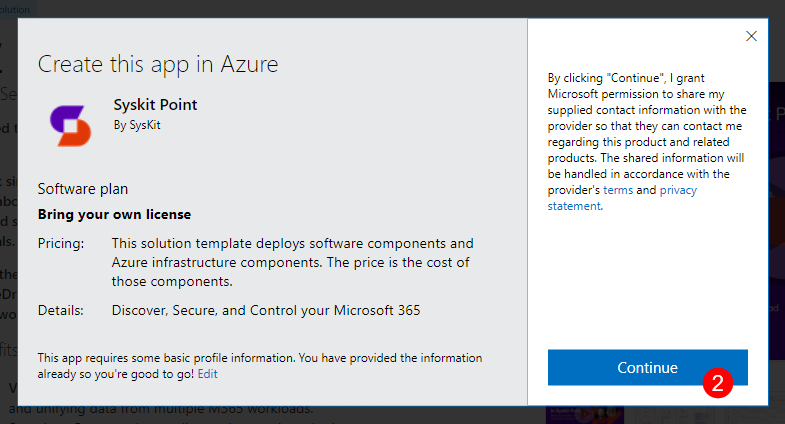
- Click the Get It Now button (1); a confirmation dialog opens
- Click the Continue (2) button; you will be redirected to Azure Portal
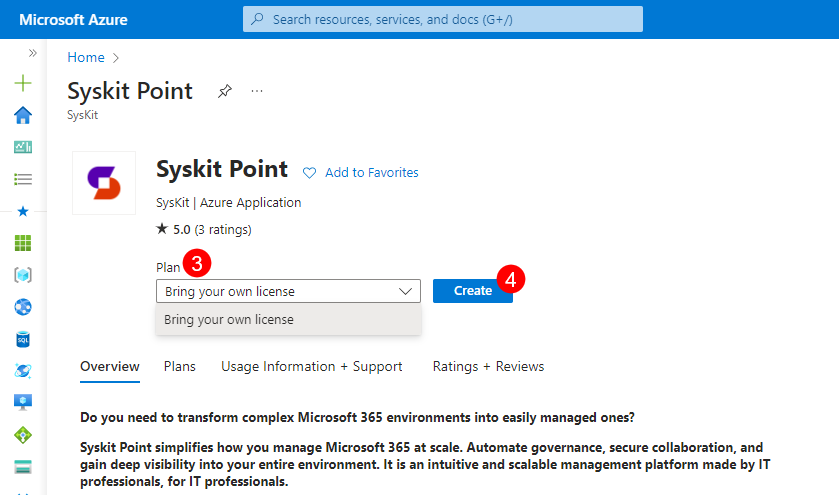
- Select the Plan (3) from the dropdown menu
- Click Create (4) to continue with the deployment configuration; Create Syskit Point screen opens with the Basics tab selected
Azure Resources Deployment
Before deploying Azure resources needed to run Syskit Point, you will be prompted to configure several options grouped into four tabs:
- Basics
- Web application settings
- Storage settings
- Network configuration
The last available tab - Review + create - shows an overview of all configured options to check before the deployment is started.
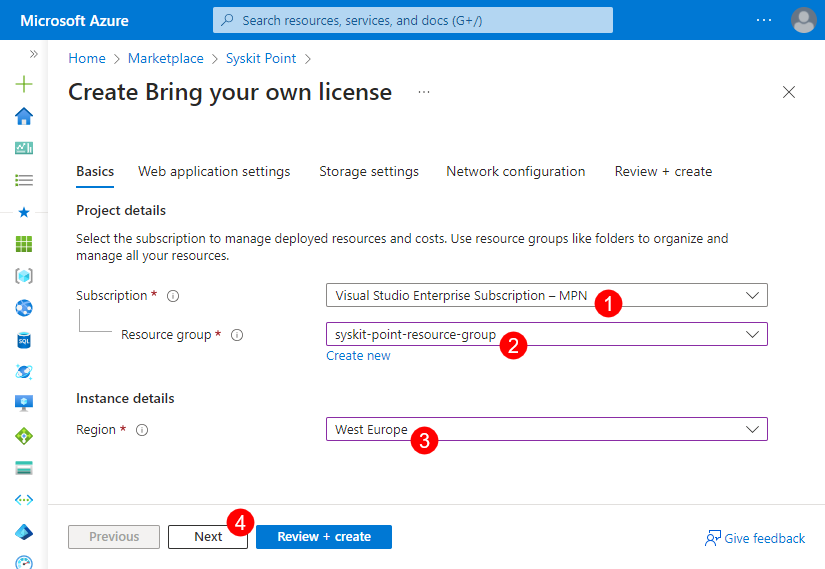
The Basics tab enables you to:
- Select the Azure subscription (1)
- Select an existing or create a new resource group (2) within which the Syskit Point resources will be created
- Choose the Azure region (3) where Syskit Point resources will be created
- Click Next (4) to proceed to the Web application settings tab
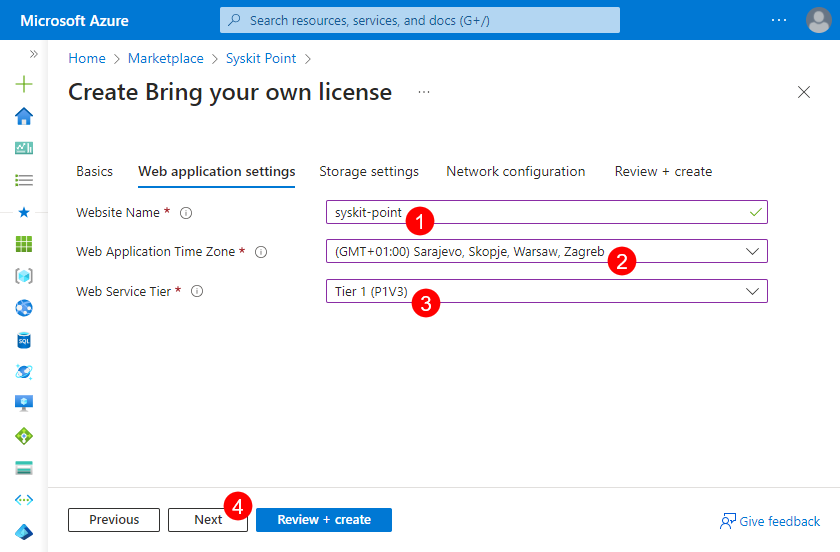
On the Web application settings tab, you will need to define the following:
- Website Name (1); must be a unique name to create FQDN; the resulting Point web app URL will be:
{websiteName}.azurewebsites.net - Web Application Time Zone (2)
- Web Service Tier (3)
- Click Next (4) to continue with the Storage settings configuration
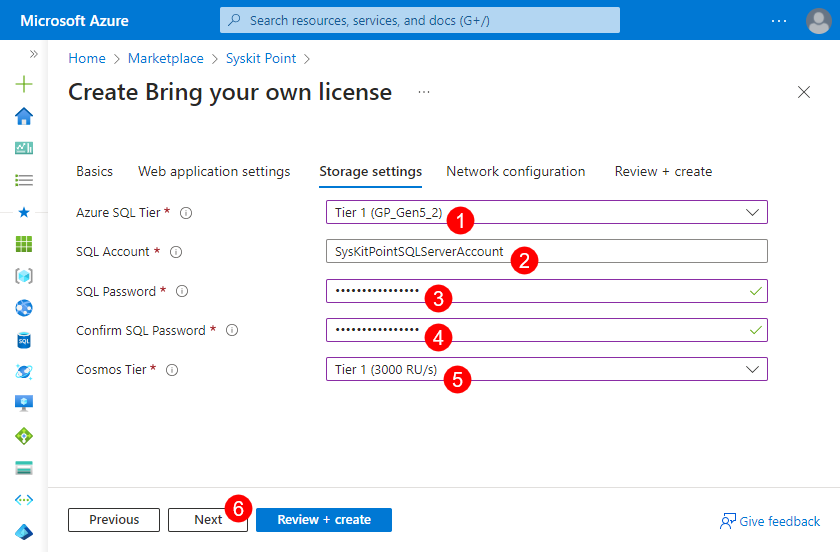
Define the following on the Storage settings tab:
- Azure SQL Tier (1)
- SQL Account (2)
- SQL Password (3); enter the same password in the Confirm SQL Password (4) field
- Cosmos Tier (5)
- Click Next (6) to move to the Network configuration tab
Please note! This is mandatory to provision a new SQL server as this is a Microsoft requirement. Without the SQL credentials, it would not be possible to create the SQL server; however, after the initial deployment, the credentials will not be used again. The SQL authentication is disabled, and Managed Identity authentication will be used in the future.
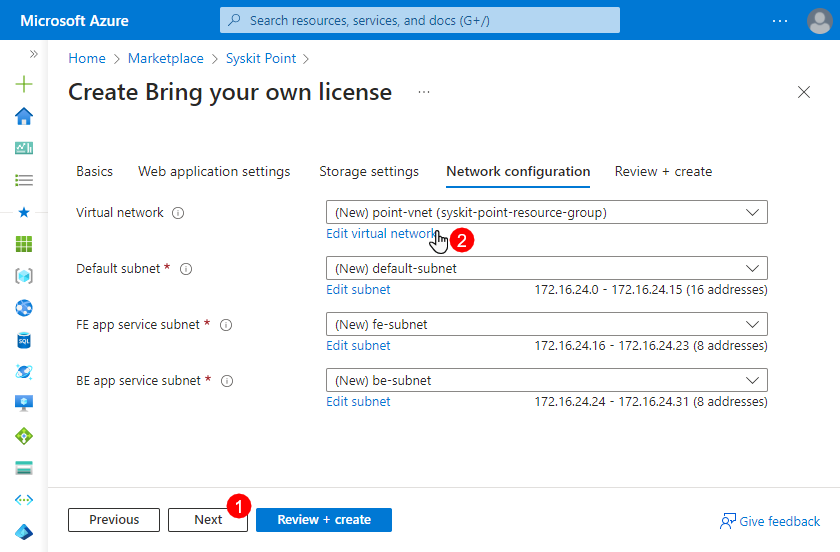
The Network configuration tab enables you to configure virtual network used by Syskit Point resources. Depending on your use case, you have two options available:
- Use the predefined virtual network configuration - a new virtual network is created when deploying Syskit Point; no additional configuration is needed, and you can proceed to the next step by clicking the Next button (1), or
- Customize the virtual network settings by clicking the Edit virtual network (2) option
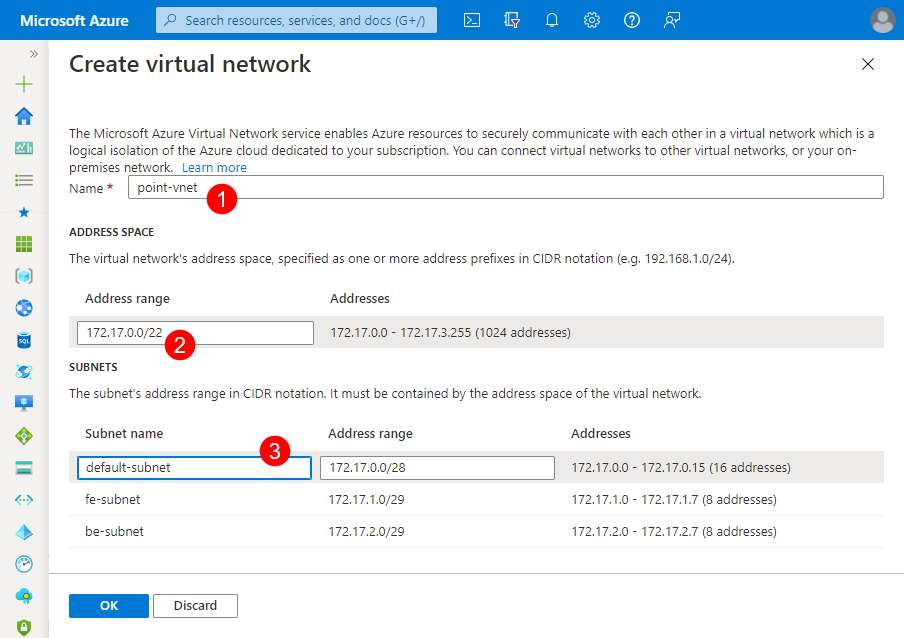
If you click the Edit virtual option, a new screen appears where you can change the predefined settings:
- Name (1) of the virtual network
- Address range (2)
- Names and address ranges (3) for Default, FE app service, and BE app service subnets
Please note!
Predefined ranges comply with the minimum requirements for Syskit Point resources to work properly.
If you decide to change the predefined values, ensure that all subnets have 255 IP addresses reserved.
Click OK when you finish the virtual network setup.
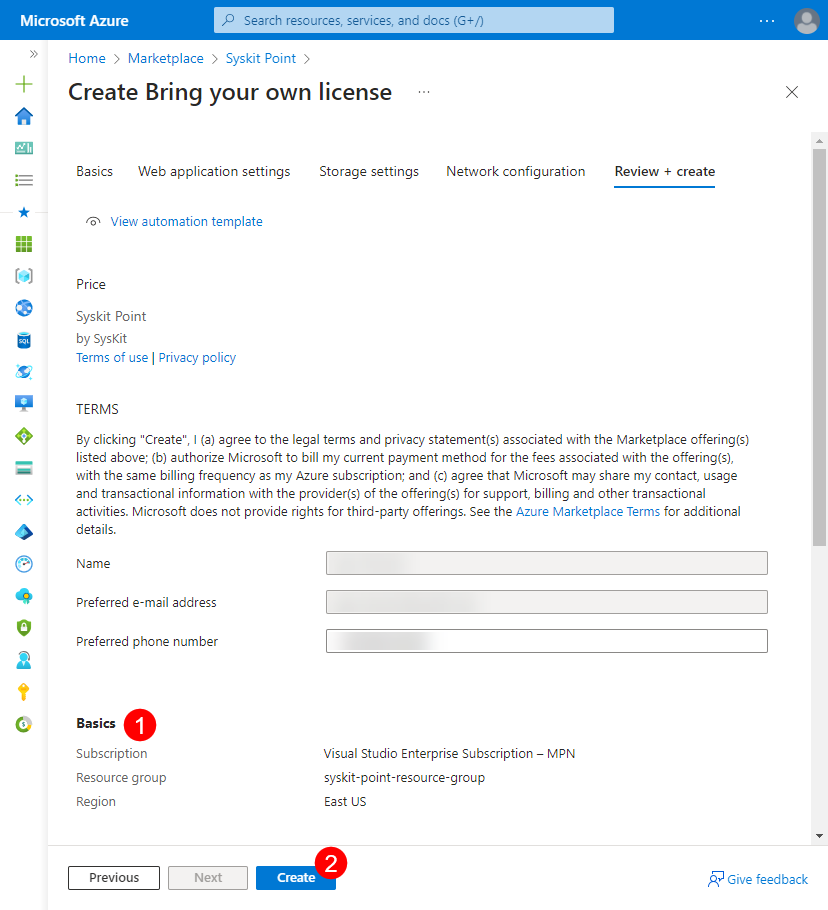
The Review + create tab shows the following information:
- Configuration summary (1) showing all options selected in previous steps
- Create button (2); once clicked, the deployment of Azure resources starts
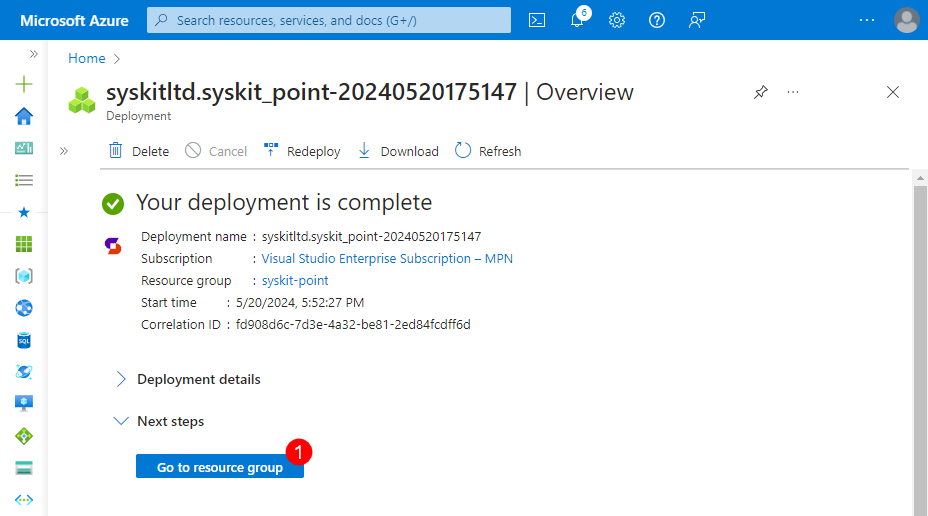
At the start of the deployment, you will be redirected to a page showing the deployment progress. After 5-10 minutes, the deployment is complete, and the Go to resource group (1) button appears, as shown in the image below. Click the button to open the Resource group's Overview page, showing all created Azure resources.
With the described deployment, all Azure resources needed to run Syskit Point are created, and no additional installation is needed. You can now access Syskit Point by opening the Syskit Point web app URL in a browser.
Syskit Point Web App URL
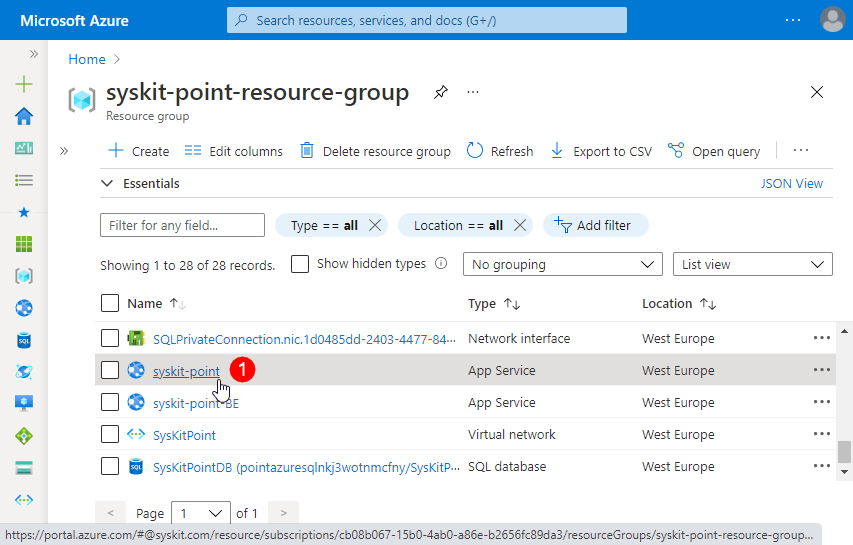
To view the Syskit Point web app URL, do the following:
- Navigate to the Overview screen of the created resource group
- Find and click the app service resource (1)
- Click the URL link (2) available in the Essentials section on the app service's Overview screen
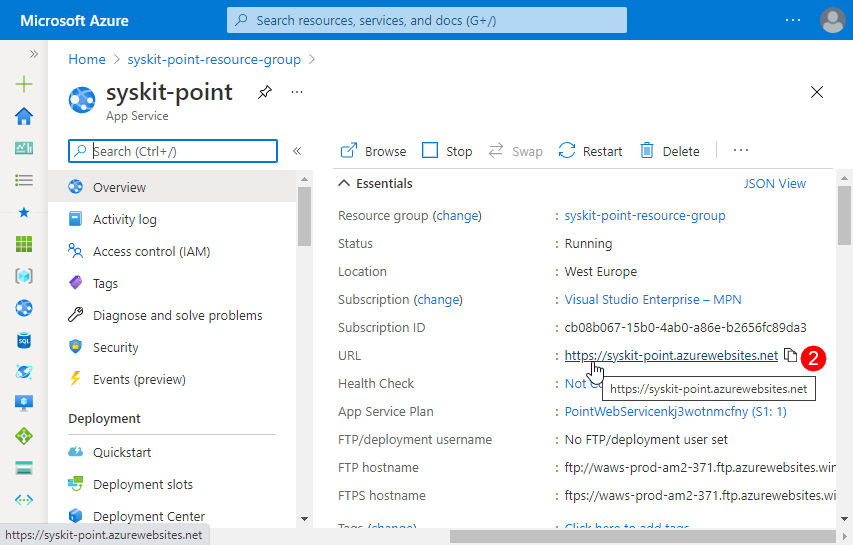
The Syskit Point web page opens. First, you will be prompted to activate Syskit Point Once activated, Syskit Point will guide you through the process of connecting to a tenant for the first time.
Related Topics
- System Requirements
- Activate Syskit Point
- Connect to Microsoft 365 Tenant
- Set Up Custom Domain and SSL Certificate
If you have additional questions or concerns, please contact us.