Enable/Disable Provisioning
When the Syskit Point Teams app is deployed, Provisioning is marked as enabled by default; however, there is an option to disable it.
If Provisioning is disabled, the Request Workspace button will no longer be visible in the Syskit Point Teams app.
How to Enable or Disable the Feature
You can change the status of the Provisioning feature by going to Settings and under Governance selecting Provisioning.
This will open the Provisioning screen, and on the right side, under the title, you will see the button to Disable or Enable provisioning.
As the feature should be enabled by default, if you, as the admin, want to use Access Requests only, you can disable provisioning by clicking the Disable provisioning (1) button.
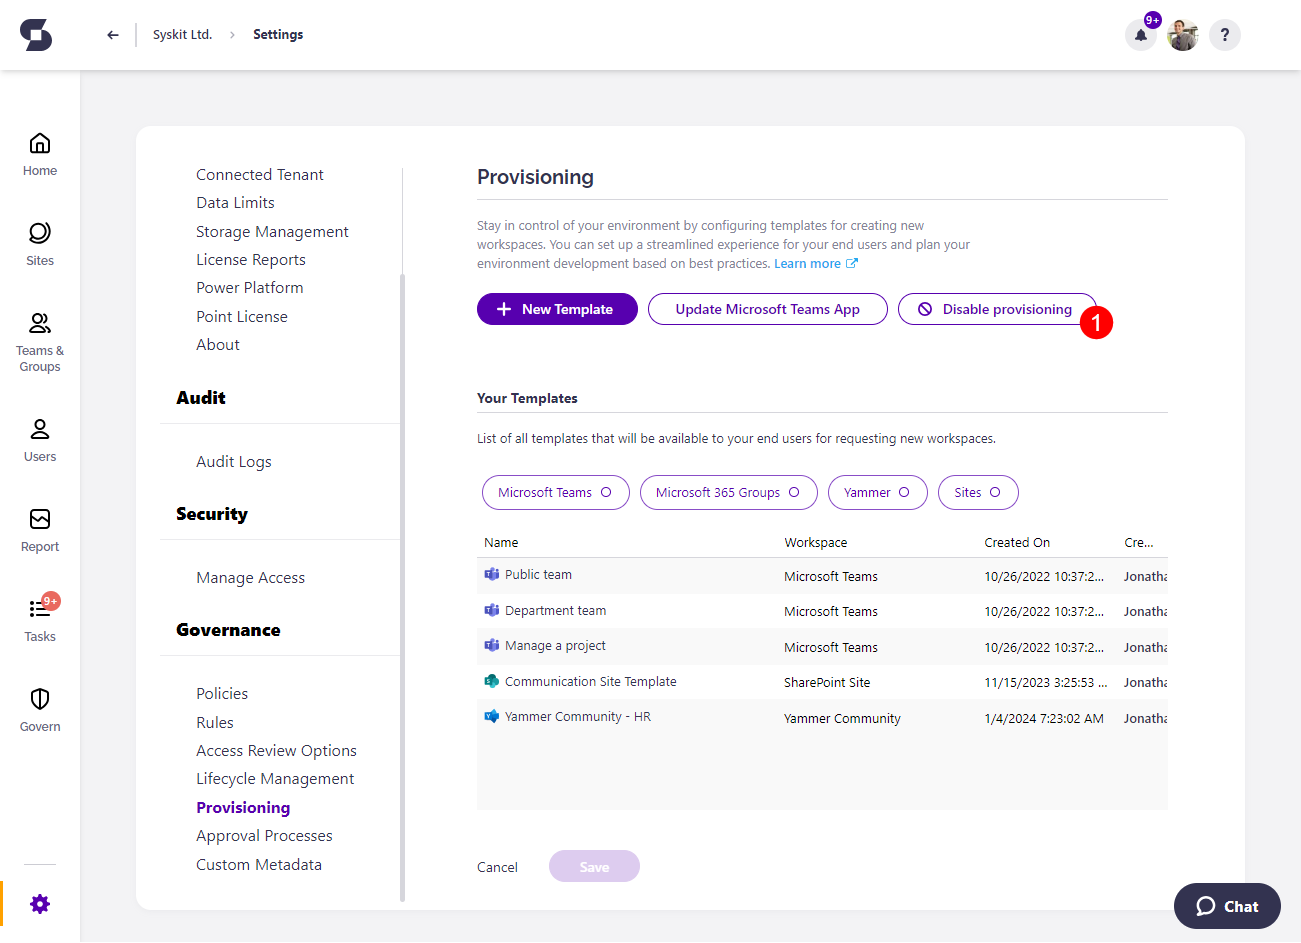
- Clicking Disable provisioning will open a pop-up that will ask you to confirm your decision by clicking Disable.
- Clicking Disable will not erase any previously created provisioning templates.
- If there are any pending Workspace requests, you will still have the ability to complete them after clicking Disable.
- Once Provisioning is disabled, the Request Workspace button will not be visible in the Syskit Point Teams app.
Once disabled, you can still enable provisioning at any point by clicking the Enable provisioning (1) button.
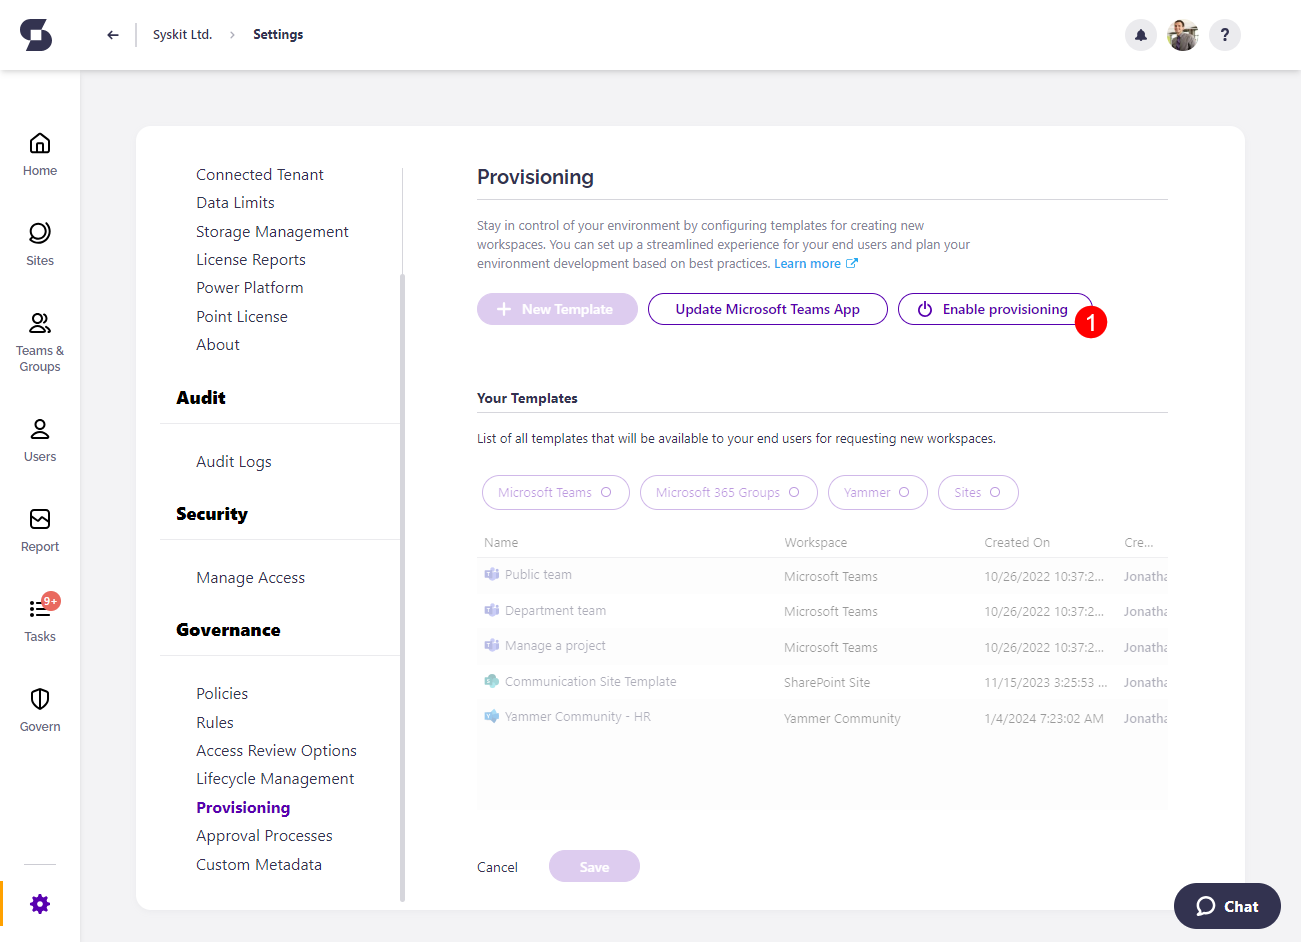
- Clicking Enable provisioning will open a pop-up that will ask you to confirm your decision by clicking Enable.
- Clicking Enable will allow your end-users to request new workspaces.
- Once Provisioning is enabled, the Request Workspace button will be visible in the Syskit Point Teams app.