Set Up E-Mail
Syskit Point sends e-mails to owners, administrators, and other users when policies are enabled and applied.
Here, you can find all the information needed to successfully configure e-mail settings, which Syskit Point will use to send the e-mails.
Please note!
Only users assigned to the Syskit Point Admin role can access and configure Settings in Syskit Point.
For Syskit Point to be able to send e-mails, you need to configure the sending method. Two options are available:
- Exchange Online
- SMTP - Simple Mail Transfer Protocol
Please Note!
The e-mail address set up in this section will appear in the Sent from field in all e-mails sent from Syskit Point.
Exchange Online Settings
Please Note!
Exchange Online has a sending limit of 10000 e-mails per day.
Please Note!
When setting up the e-mail, please use a supported mailbox address, as specified in the table below.
| Mailbox type | Supported |
|---|---|
| Microsoft 365 user mailbox | YES |
| Shared mailbox | YES |
| Distribution list | NO |
| Microsoft 365 group | NO |
| E-mail enabled security group | NO |
The Exchange Online method enables you to use an existing Exchange account in your Microsoft 365 tenant to send e-mails from Syskit Point. Here, you can:
- enter a valid e-mail address in the Sent from field (1)
- choose whether to save e-mails sent by Syskit Point to the Sent items folder (2); by default, this option is turned on, meaning that all e-mails sent from Syskit Point will be stored in the Sent mailbox folder of the entered Exchange account
- Send a test e-mail (3) to check if the entered e-mail address is working properly
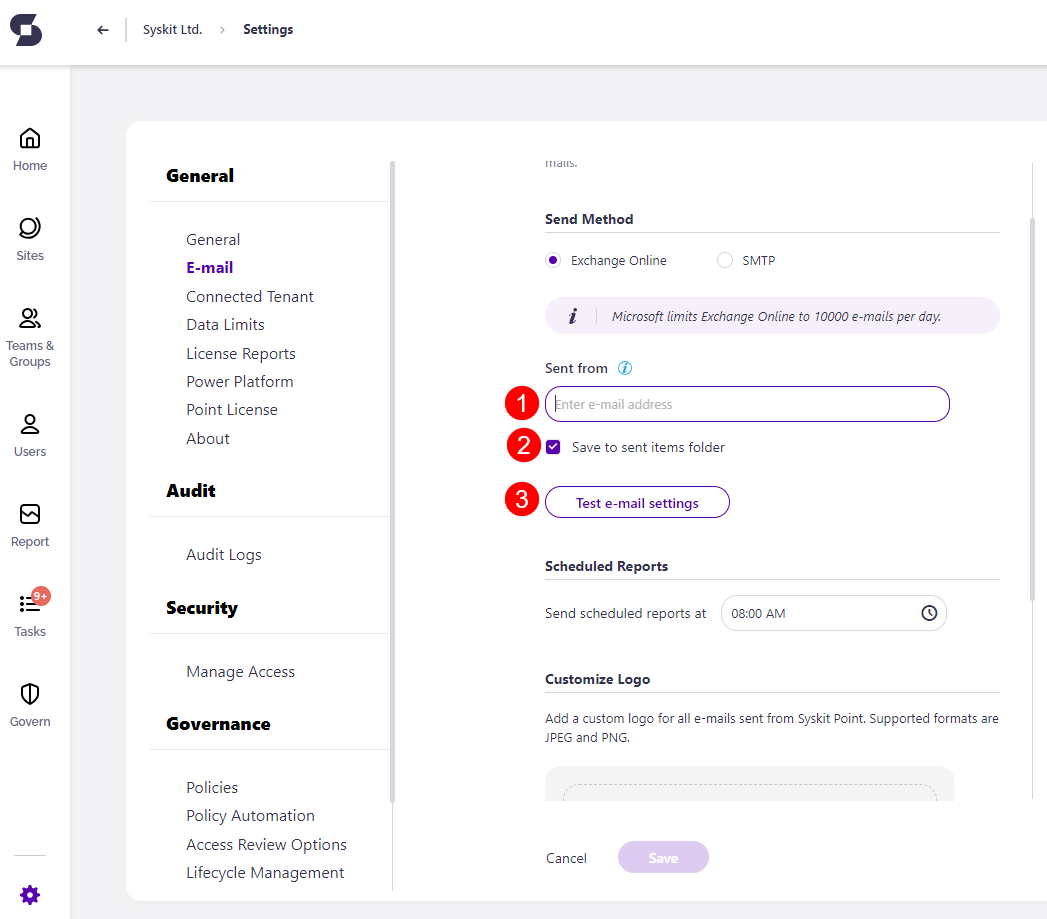
After you click the Send test e-mail button, the Sent test e-mail dialog opens. Here, enter the e-mail address to which you want to send the test e-mail. After a moment, you should receive an e-mail like the one pictured below.

Click the Save button to store your e-mail settings.
SMTP Settings
Select the SMTP method if you are using an SMTP server in your environment. Here, you can enter the SMTP properties:
-
Outgoing Server
-
Port
-
Sent from e-mail
- The email format can also be the following: DisplayName <email@domain.com>
-
Username and Password; in case the Require Authentication option is enabled
You can also choose whether to Use Encrypted Connection (SSL).
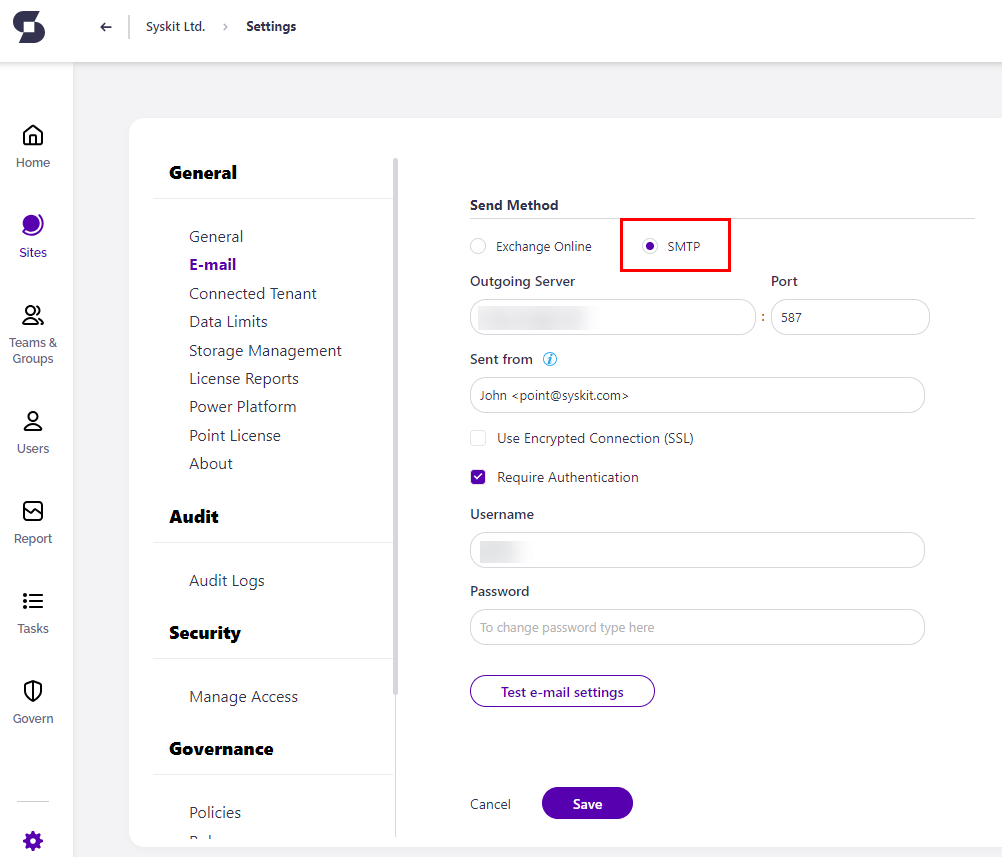
You can check if the entered data is correct by sending a test e-mail.
Click the Save button once you confirm that the test e-mail was received.