Workspaces with Too Many Members
Syskit Point detects workspaces that have too many members, which makes it more difficult to control access and permissions for the workspace and could lead to security concerns.
The Workspaces with Too Many Members policy cannot have task delegation enabled. That means no tasks are created to resolve this policy vulnerability, and no emails are sent to collaborators.
The workspaces with too many members are still detected and shown on the Security and Compliance dashboard. This means that Syskit Point detects a vulnerability on a workspace based on the applied policy, but it does not create tasks or send any emails to collaborators.
The purpose of this is to assist Syskit Point admins by bringing awareness of potential issues in their Microsoft 365 environment.
On the Security & Compliance dashboard, click the Workspaces with Too Many Members button to see the report.
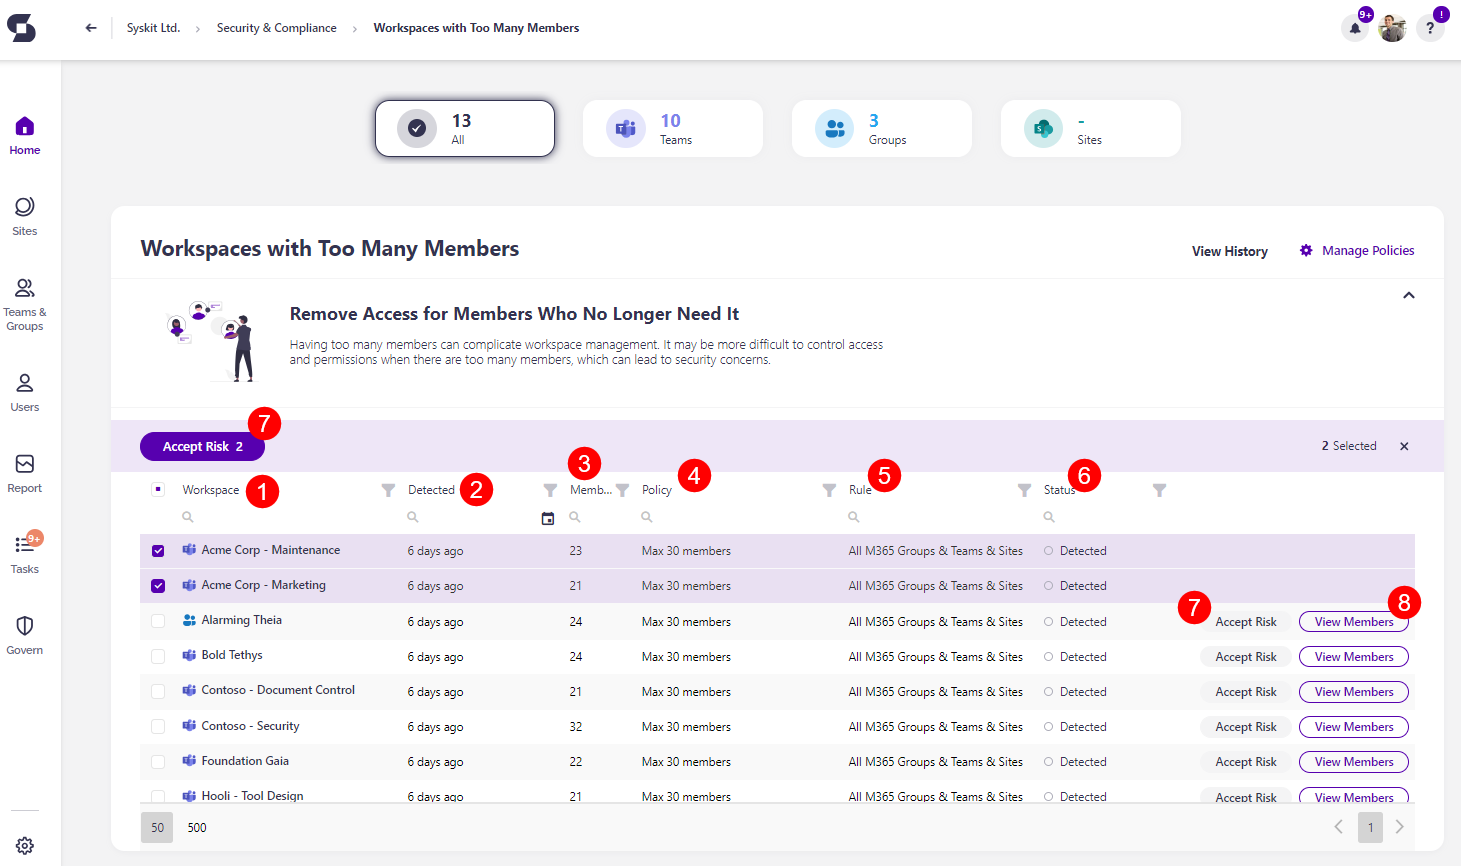
The Workspaces with Too Many Members screen opens, showing a list of all workspaces that have too many members, which means the workspace surpasses the member limit you set for the policy.
The report itself provides information on:
- Workspace (1) name of the workspace
- Detected (2) - when the policy vulnerability was detected
- Members (3) - the number of members that are a part of the workspace
- Policy (4) - the policy vulnerability that has been detected
- Rule (5) - the rule that has been assigned, if any
- Status (6) - the status of the policy vulnerability
You can complete the following actions for the policy vulnerability:
- Accept Risk (7) - this means you will close the policy vulnerability without making any changes to the current state of the workspace
- By selecting multiple workspaces, you can perform the bulk Accept Risk action (7)
- View Members (8) - this opens the screen where you can view more details
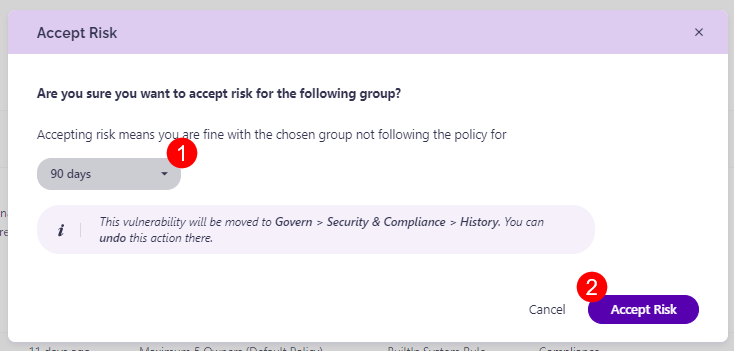
Accept Risk
Clicking the Accept Risk button opens the Accept Risk pop-up. To delay this violation, complete the following:
- Select the number of days (1) this policy vulnerability should be delayed for.
- Once you accept the risk, this vulnerability is moved to the Govern > Security & Compliance > History section, and you can undo the action there.
- Click the Accept Risk button (2) to finalize your decision.
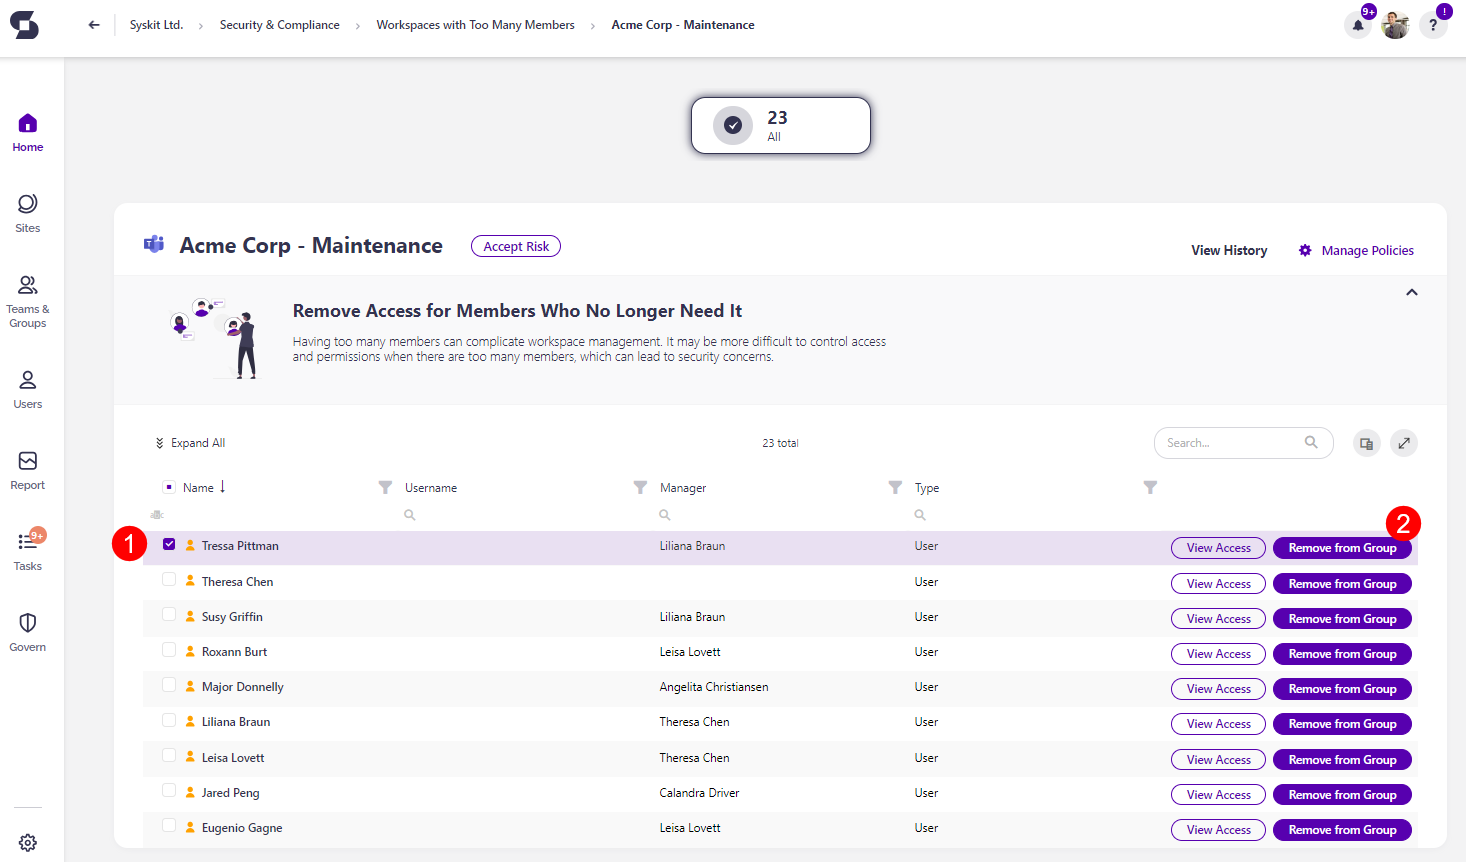
View Members
Clicking the View Members button opens the workspace screen that shows a list of all members included in the workspace.
To remove members that are no longer needed, complete the following:
- Select one or more users (1) that you want to remove from the workspace.
- Clicking View Access for any individual user generates the User Access report for that user.
- Click the Remove from Group button (2) which opens the Remove from Microsoft 365 Group pop-up.
- To finalize, click Remove on the pop-up and the user is removed from the members list for that workspace.