Rules
The Rules feature lets you create rules for auto-applying policies based on conditions - be it predefined in Syskit Point or your custom metadata.
Available conditions are explained in more detail in the Conditions section
Rules for policies make managing your environment and keeping it secure easier and more efficient. You can define rules in Syskit Point that will automatically apply policies (for example, Access review, Maximum or Minimum number of owners, etc.) to your newly created workspaces without having to apply them manually. It also means you'll need to create fewer provisioning templates to secure your environment.
For example, let's say you want to keep an eye on the access given to all the external users included in your Private Microsoft Teams & Groups. You can set this up easily by using the Rules feature in the following way:
- For conditions, set Privacy to Private for the first condition, and then add a second condition using Workspace Type and select the Microsoft 365 Groups & Teams from the list that will show.
- Under policies, select Access Review and choose the External Users option. After that, the policy will be applied across your tenant to all workspaces that fit the rule you set up.
In this article, you can find information on the following:
Please Note!
To activate rules for auto-applying policies, please make sure you have already set up your policies under the policies section. Follow this article for more information.
Default Rule
When you acquire Syskit Point, a default rule is created that applies default policies to all workspaces in your environment - Minimum 2 Owners (Default Policy), Maximum 5 Owners (Default Policy), and Orphaned Workspaces (Default Policy); these policies serve to give you an overview of workspaces that are potentially not configured according to best practices;
- Default policies are configured as detection-only policies, meaning that Syskit Point will not create tasks or send emails.
- If you have already applied Policies to your workspaces, the default rule is configured to have the lowest priority, meaning that all additional rules that you create will have precedence.
- The default rule is hidden from settings and cannot be modified or deleted.
Create Rules
To create rules for auto-applying policies, take the following steps:
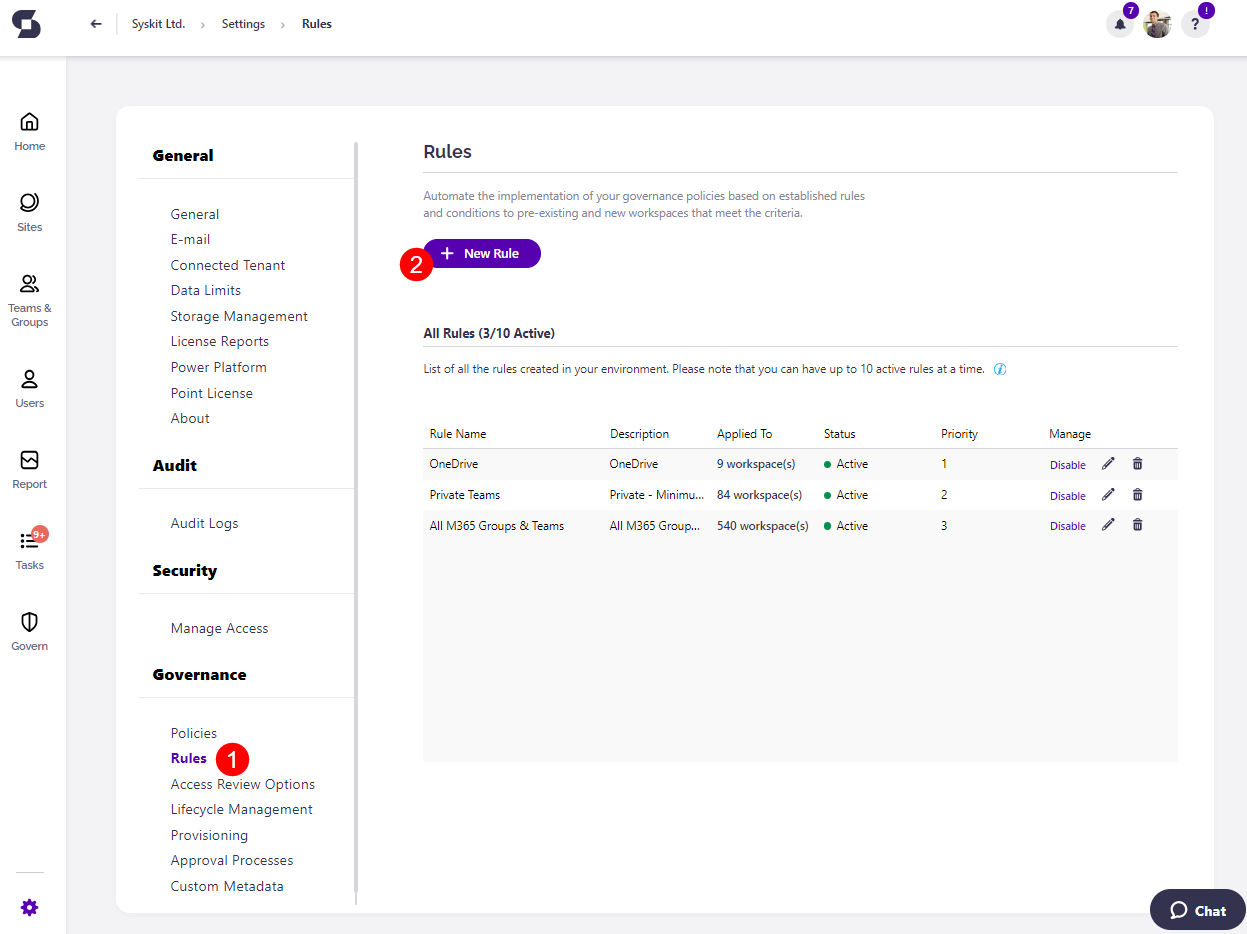
- Open your Syskit Point and navigate to Settings and under Governance select Rules (1)
- Click the New Rule button (2) and a pop-up will appear
To create the rule, fill out the following information, as requested on the pop-up:
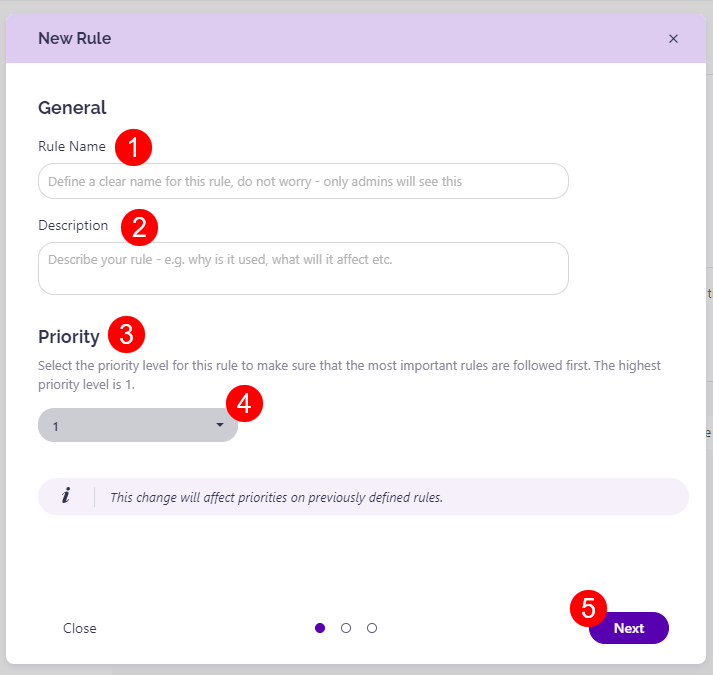
- Under the General section, fill out the following:
- Rule Name (1) - in this space, you can write your desired rule name
- Description (2) - use it to describe the rule which you want to create
- Under the Priority section (3), set your desired level of priority for this rule by selecting a number (4) from the drop-down menu
- Priority will be set as 1 by default and is the number that signifies the highest priority, with the number furthest from 1 signifying the lowest priority level
- This change also affects priorities on previously defined rules
- For more details on this, take a look at the Priority and Overrides section of this article
- When ready, click Next to continue (5)
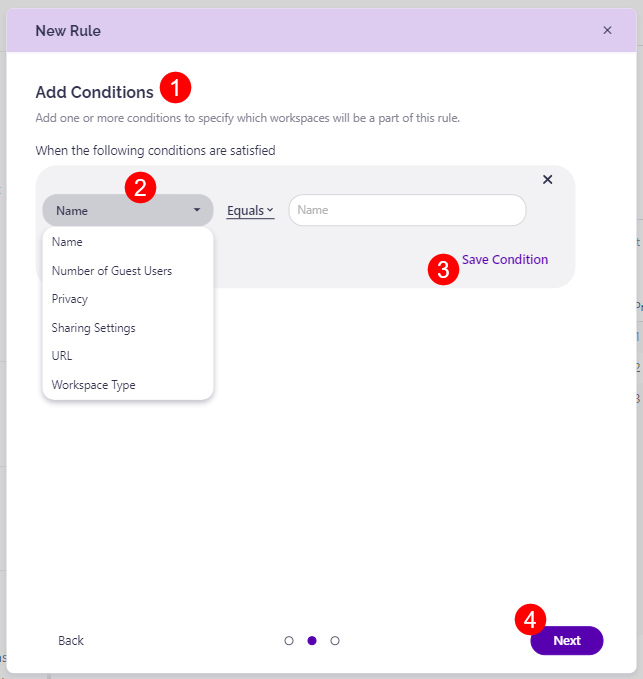
- Under the Add Conditions (1) section, set the conditions for your rule (2) by using the drop-down menu
- Once you've set the condition, click the Save Condition (3) button
- Once saved, if you want to make changes click the edit button
- Once saved, if you want to delete it, click the delete button
- When you're ready, click Next to continue (4)
Available conditions are explained in more detail in the Conditions section
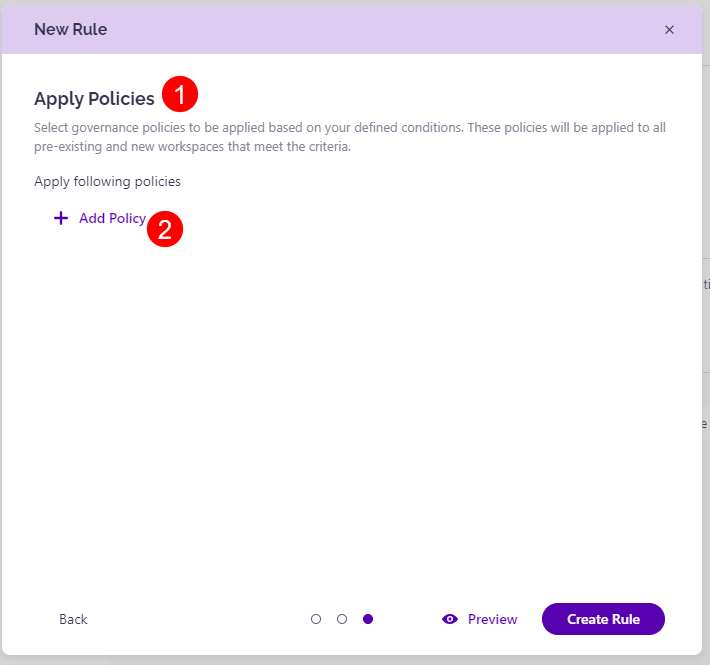
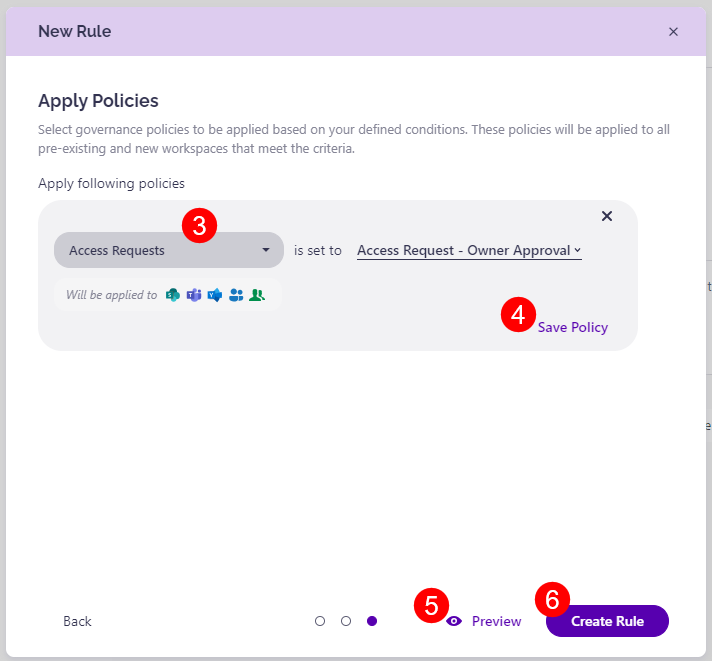
- Under the Apply Policies (1) section, you can select which policies the rule should apply for
- In the section Apply following policies select the Add Policy (2) button and select your desired policy (3) from the drop-down menu available
- Once you've selected the policy or policies, click the Save Policy (4) button
- If you've set a policy but want to change it, click the edit button
- If you've set a policy but want to delete it, click the delete button
- Click the Preview button (5) when your preferences have been set to see how this new rule would affect your workspaces
- By clicking preview, you can also see if there are any “Priority Overrides” on any of your workspace
- Click the Create Rule button (6) to finalize your selection
The rule is enabled once you've created it and will start applying defined policies for the workspaces that meet the defined conditions.
Please Note! While you can create more than 10 rules for policies, only 10 rules can be active at once. If you already have 10 rules active, you will not be able to create new rules without disabling one or contacting Syskit support.
Conditions
Conditions are one of the key elements in rules, as they enable the filtering of workspaces where Syskit Point will apply the defined governance policies.
When defining conditions, you need to:
- Select a property that is checked
- For example, Privacy
- Choose an operator (where available)
- For Privacy, the operator is predefined - is set to
- Select the value of the property that satisfies the condition
- Private or Public
In this example, if you define the condition to state Privacy is set to Private, the Rule will apply the defined policies to Private workspaces only.
There are two types of available properties you can select when setting up conditions:
- Predefined properties
- Such as Privacy or workspace Name
- Custom metadata
- Workspace properties defined in Custom Metadata in Syskit Point or via third-party tools and synced to Syskit Point
- Since there is no limitation on how you should name your custom metadata or the number of custom metadata properties you create, Syskit Point focuses on supporting custom metadata types, such as number, boolean, and string
- For example, if you define custom metadata named Project End Date, the data type would be set to Date; for Project Name, the data type would be set to Text, etc.
In the following table, you can find all predefined properties and operators currently available in Syskit Point.
| Workspaces property | Operator(s) | Value |
|---|---|---|
| Created | After, Before, Between | Select date in date picker |
| Data Location | Equals, Not Equals, Starts With, Contains | Enter text |
| Department | Is set to | Select one or multiple departments from available values |
| Lock State | Is set to | Select one or more of the following values: Unlocked, Read-only, Locked |
| Name | Equals, Not Equals, Starts With, Contains | Enter text |
| Number of Admins | Is Equal, Greater Than, Greater Than or Equal, Less Than, Less Than or Equal | Enter a number |
| Number of Anonymous Links | Is Equal, Greater Than, Greater Than or Equal, Less Than, Less Than or Equal | Enter a number |
| Number of Company-Wide Links | Is Equal, Greater Than, Greater Than or Equal, Less Than, Less Than or Equal | Enter a number |
| Number of Guest Users | Is Equal, Greater Than, Greater Than or Equal, Less Than, Less Than or Equal | Enter a number |
| Number of Inactive Guests | Is Equal, Greater Than, Greater Than or Equal, Less Than, Less Than or Equal | Enter a number |
| Number of Items shared externally | Is Equal, Greater Than, Greater Than or Equal, Less Than, Less Than or Equal | Enter a number |
| Number of Items shared with Everyone | Is Equal, Greater Than, Greater Than or Equal, Less Than, Less Than or Equal | Enter a number |
| Number of Owners | Is Equal, Greater Than, Greater Than or Equal, Less Than, Less Than or Equal | Enter a number |
| Number of Sensitive Anonymous Links | Is Equal, Greater Than, Greater Than or Equal, Less Than, Less Than or Equal | Enter a number |
| Number of Sensititve Company-Wide Links | Is Equal, Greater Than, Greater Than or Equal, Less Than, Less Than or Equal | Enter a number |
| Number of Sensitive Files | Is Equal, Greater Than, Greater Than or Equal, Less Than, Less Than or Equal | Enter a number |
| Number of Shadow Users | Is Equal, Greater Than, Greater Than or Equal, Less Than, Less Than or Equal | Enter a number |
| Privacy | Is set to | Select from the available values: Private, Public |
| Sensitivity Label | Is set to | Select one or multiple sensitivity labels from available values |
| Sharing Settings | Is set to | Select one or more of the available values: Only people in your organization, New and existing guests, Anyone, Existing guest only |
| URL | Equals, Not Equals, Starts With, Contains | Enter text |
| Workspace Type | Is set to | Select one or more of the available values: Security Group, Distribution List, Mail-Enabled Security Group, Microsoft 365 Group, Microsoft Teams, SharePoint Site, OneDrive, Microsoft 365 Group with Viva Engage |
Additionally, the following custom metadata types and related operators are supported:
| Custom Metadata Type | Operator(s) |
|---|---|
| Text | Equals, Not Equals, Starts With, Contains |
| Date | After, Before, Between |
| Boolean (Yes/No) | Is set to |
| Number | Equal, Greater Than, Greater Than or Equal, Less Than, Less Than or Equal |
| Dropdown | Select one or multiple options |
| People | Search and select one or multiple users |
Priority and Priority Overrides
When it comes to setting the priority for your rules and how an override is applied to them, there are a few key things to keep in mind.
-
Manually applied policies always have the highest priority
- This means that even if a rule's priority is set as 1 if there is a policy that was manually applied, the rule will not apply a policy of the same type to that workspace
- It also means that if you have provisioning set up and policies defined in your templates, they will have precedence over the rules you create for them within the Rules settings
-
When considering priority levels for your rules, note that the lower the number the higher the priority
- This means that the highest priority rule should be set as 1 and the lowest priority rule should be set as the highest number available
-
If there are two rules that apply policies of the same type, the rule with the highest priority level applies the policy
- Clicking Preview shows you the Priority Override for the workspaces where the rule with the higher priority number will apply policies over the rule with a lower priority
-
If two rules contain different policy types that apply to the same workspace, both rules apply the policies
Manage Rules
Once you save a rule, it is enabled by default, but you can still edit or remove it.
To manage your rules, complete the following:
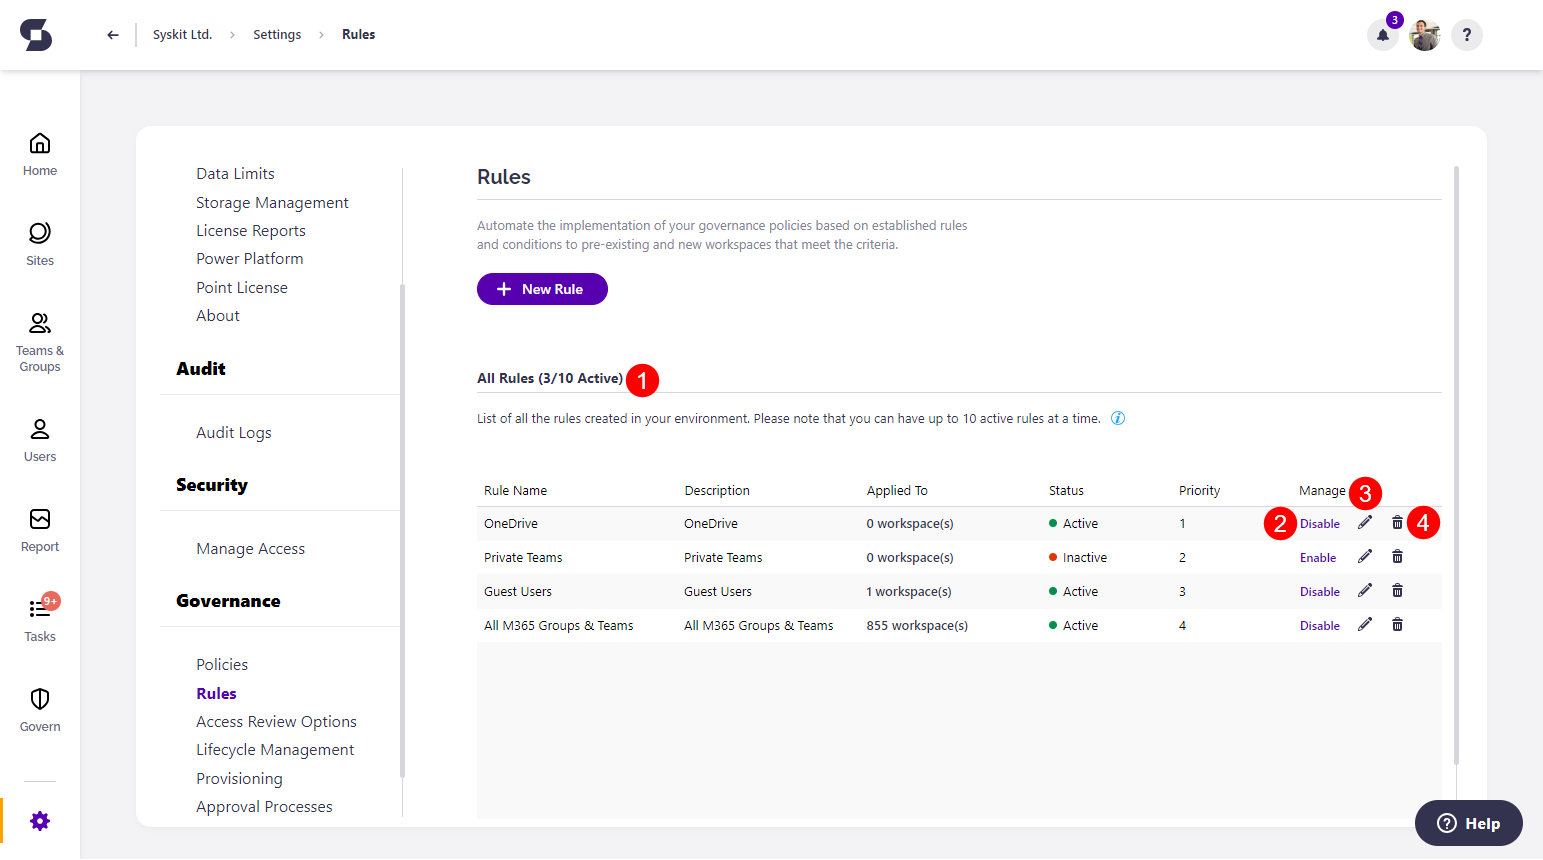
- Navigate to Settings > Governance > Rules (1)
- Under the All Rules (1) section, you can see a list of all rules created for your environment as well as a number that shows the number of currently active rules out of the 10 active spots available
- To disable a rule in order to place another rule as active, click the Disable button (2) located under the Manage column
- This can be done if you fill all 10 spots open for active rules and want to replace one or in case a rule should be temporarily deactivated
- To edit a rule and make changes, click the Edit button (3) located under the Manage column
- To delete a rule and remove it from the list completely, click the Delete button (4) located under the Manage column
If you disable, delete, or update a rule with policies assigned to it, any tasks related to those policies will be set as Canceled.
Additionally, by clicking on the resolve task email you received, the site in Syskit Point will show the task as canceled due to the policy having been removed from the workspace.
When the rule is enabled again, the old tasks will remain as canceled, but when triggered, a new task will be assigned.
Access Review is the only policy where the task will not be canceled if the rule is disabled, deleted, or updated.
:::