Approval Process
After a user requests access to a workspace, it will need to be approved based on the approval process selected when creating the Access Requests policy.
This can be any of the following:
- Manager approval
- Manager and admin approval
- Admin approval
- Automatically Approve
- Owner approval
Or it can be based on a new approval process that was created for the Access Requests policy.
You can read more about this in the Create Access Requests policy article.
Approving Access Requests for Workspaces
To approve workspace Access Requests that you have received, complete the following steps:
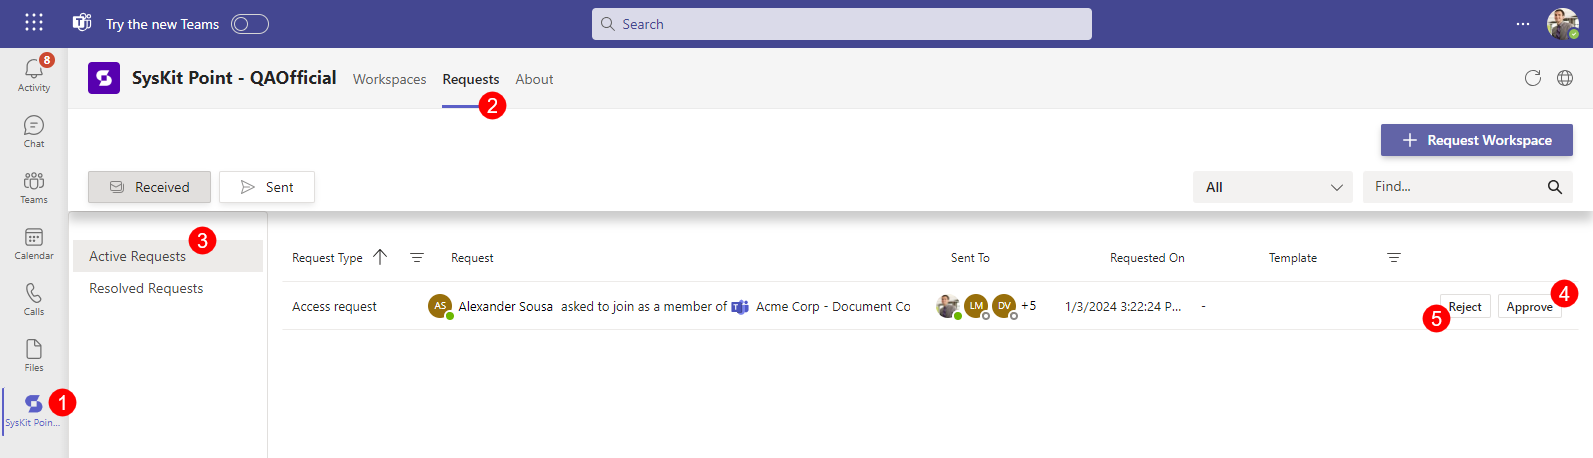
- Open your Microsoft Teams app and navigate to the Syskit Point Teams app (1)
- Click the Requests section (2); there you can see Active Requests and Resolved Requests
- Select Active Requests (3) for any current workspace requests that need your approval
- To approve the received request, click the Approve button (4) on the right side of the screen
- To reject the received request, click the Reject button (5)
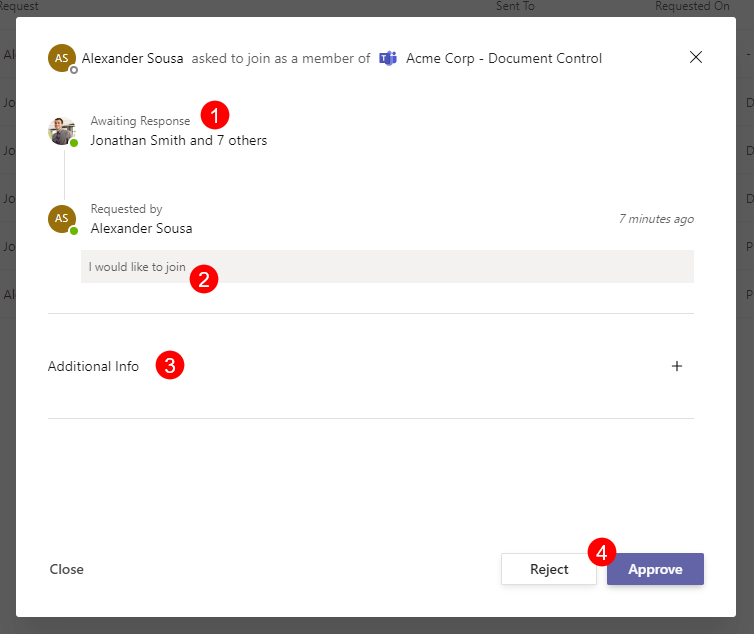
For more details on why the request was made, click on the request itself.
- This opens a screen that shows who the request can be approved by (1), and the reason for wanting to join that workspace (2) as stated by the requester
- You can also click on Additional Information (3) for more details about the workspace itself
- Here, you will find the description, owners, members, group e-mail, and other information about the workspace for which access was requested
- On this screen, you can also Approve or Reject (4) the request by clicking the buttons in the bottom right corner