Create Access Requests
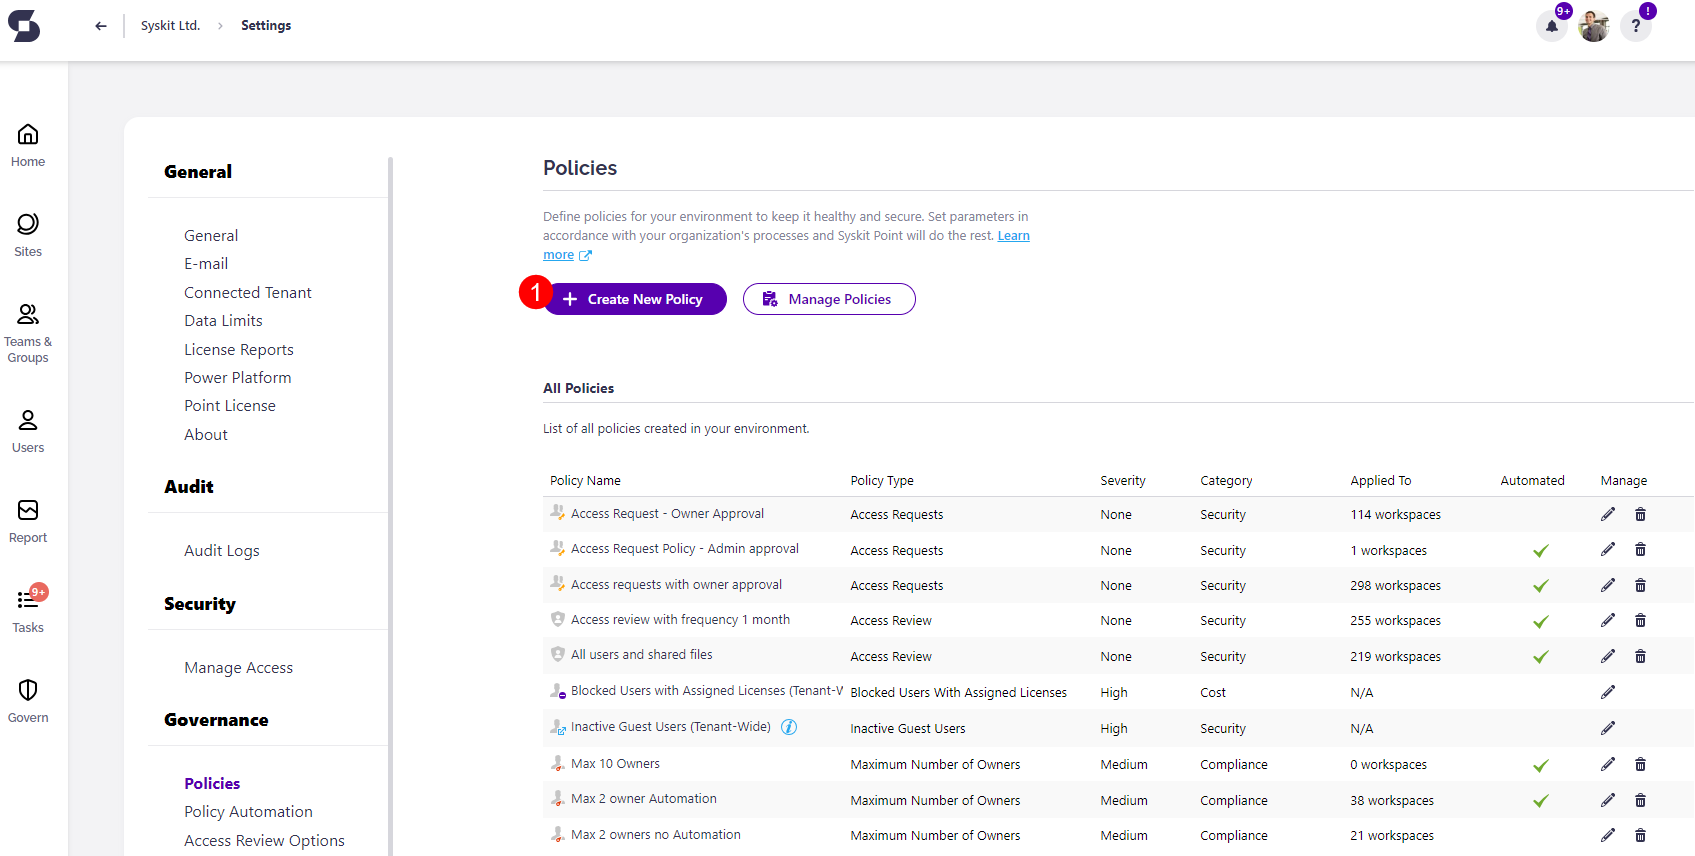
To create the Access Requests policy, open Syskit point and go to Settings.
Under Governance, select Policies.
Create Access Requests Policy
To create the Access Requests policy, complete the following steps:
- Click the Create New Policy (1) button located on the left side under the Policies title.
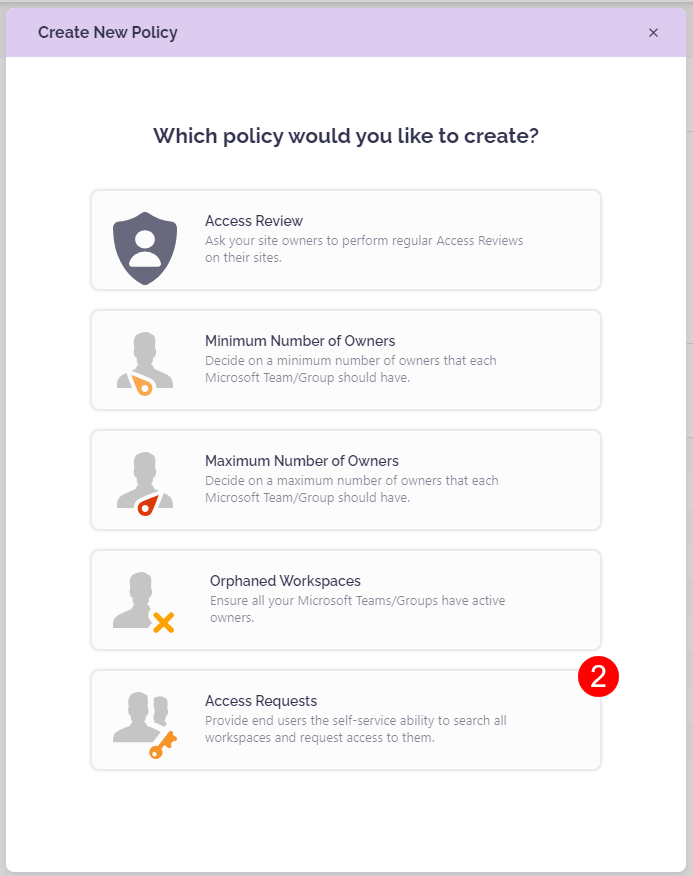
- A pop-up screen will appear, prompting you to select which policy to create.
- Select Access Requests(2) from the available list of policies.
Depending on the approval processes required for your workspaces, the following information needs to be specified:
-
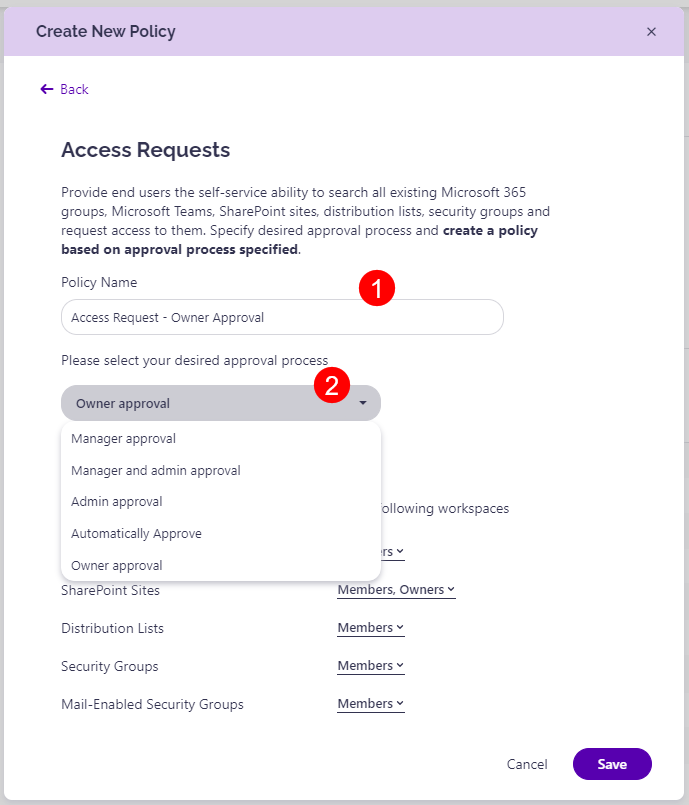
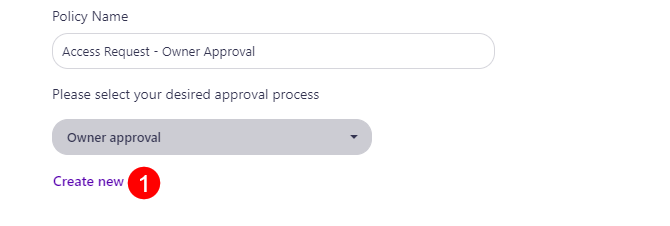
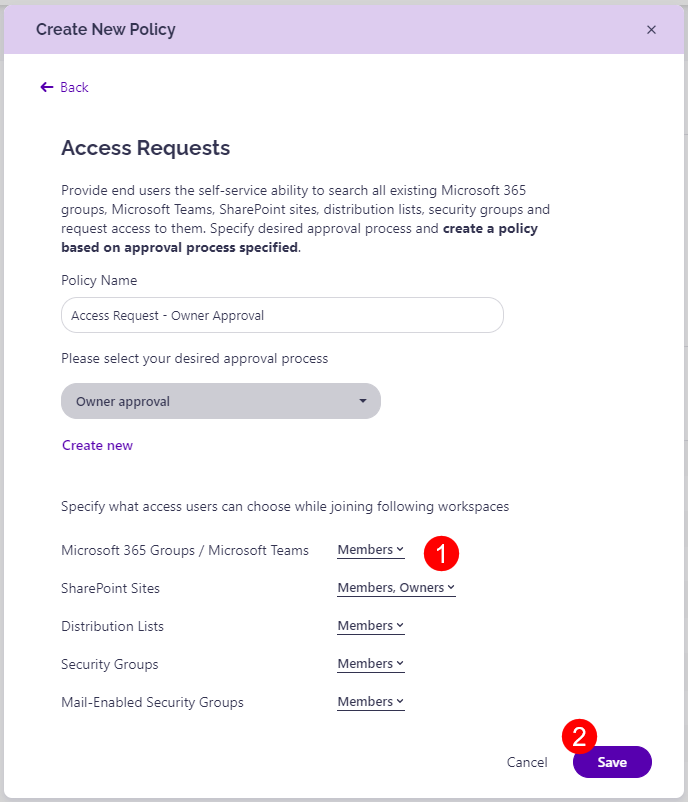
Create the new policy name (1); depending on the type of Access Requests policy that will be created
-
Select the preferred approval process (2) from the available list:
- Manager approval
- Manager and admin approval
- Admin approval
- Automatically Approve
- Owner approval
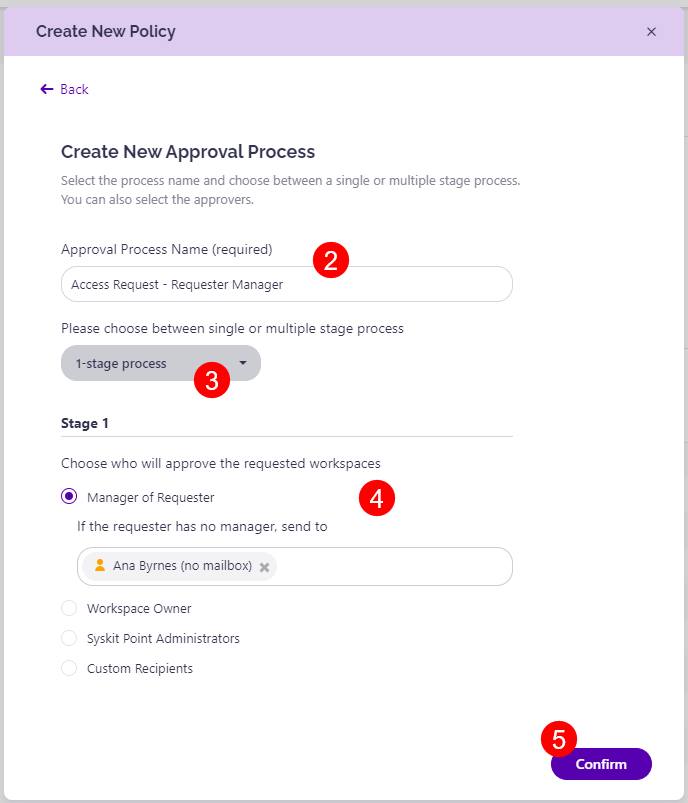
- Alternatively, you can also create a new approval process if the above does not suit your workspaces' needs:
- Click Create New (1); located under the approval process dropdown menu
- Enter the name (2) of your new approval process
- Select between the single or multiple-stage approval process (3):
- 1-stage process
- 2-stage process
- 3-stage process
- Depending on whether you selected the single or multiple-stage process, you will need to complete the below information:
- Select who approves the requested workspace (4):
- Manager of Requester; you are also able to add additional information in case the requester has no manager by entering details in the section below
- Workspace Owner; you are also able to add additional information in case the workspace has no owner by entering details in the section below
- Syskit Point Administrators
- Custom Recipients; for this option, you will need to enter the desired recipients' details in the section below
- Click Confirm (5) once finished
- Select who approves the requested workspace (4):
- After setting the desired approval process, you need to specify the level of access (1); users can request to join as Members, Owners, or both.
- This can be set for the following workspaces:
- Microsoft 365 Groups/Microsoft Teams
- SharePoint Sites
- Distribution Lists
- Security Groups
- Mail-Enabled Security Groups
- This can be set for the following workspaces:
Once you complete the above steps, click Save (2); this opens a pop-up stating that your policy has been successfully created.
The new policy can now be found in the list of all policies created in your environment.
- The pop-up also allows clicking on Apply Policy and being taken to the Manage Policies screen directly.
To enforce the new policy, it will need to be applied to workspaces in your environment. Take a look at the Apply Access Requests article for instructions on how to apply your policy.